What is fastest way to create online video course?
It’s every marketer’s dilemma.
You want to create a course but you’re worried you’ll miss something and so you never get it done.
I bet you’ve heard about the idea to create just the first lesson and then pre-sell it to later create the rest.
That certainly is a great idea but no matter how hard you try, you just can’t get started.
You’re frozen into the “where do I start” state!
Does that sound like you?
Pull the band aid off fast
Well, if you’re like me and countless others and just want it to be perfect, you’re not alone.
I mean, I’m not like that anymore because I did learn how to pull that band aid off, so let me tell you why it’s important to do that.
You’re 6 years old and know the band aid has to come off.
You are so scared that it will hurt or of what’s underneath it that you cry just at the thought of pulling it off.
Your mother says it’s better to pull if off in one quick motion because each little tug will hurt just as much.
Why give yourself pain for minutes when it could last just a second or two?
How to create a course fast!
Just like pulling off the band aid real fast, you need to do the same thing with a course.
I know, it’s not going to be perfect… it might even be your worst course ever but hear me out.
Why would you ever want to create a “bad course”???
That’s a great question and it’s hard to answer because it’s one of those things you’ll understand only after you do it.
I could tell you that you’ll learn lots that you have no idea you need to learn.
It’s like one of those things where you don’t know what you don’t know until you know you don’t it – know what I mean?
What are the steps to a fast course?
Ok, let’s just do it!
To create a course real fast, you just need to do this:
- Decide on a topic
- Layout your lessons
- Record the video
- Extract each lesson from full video
- Create course on hosting platform
- Add the lessons to the course
- Publish your course
It might seem like a lot, but having it laid out in steps makes it easy and quick to do.
The secret is to get through all these steps as quickly as possible.
Remember, this is your “fast course”, you’re not doing your “best course” or “perfect course”.
Why is it ok to create “bad” course?
You might be thinking you don’t want to stoop to that level.
I promise it’s worth it.
You’ll learn so much you didn’t even know you needed to learn.
Even if your course is bad and isn’t the kind of quality you’d want to put out there, you might notice there’s no promotion of your course in the list.
That’s because the purpose of creating a course real fast like this is to learn what you didn’t know you didn’t know.
So, let’s get into each step
Step 1: Decide on a topic
This is probably the easiest or the hardest thing for you to do.
It’s gonna be real easy if you’ve been thinking about what to teach for a while but real hard if you’re not sure or are worried about creating something less than your best work.
Just like ripping off that band aid, make a quick decision to just get it done.
Remember that this course is for practice and you’re most like not going to promote it.
Step 2: Layout your lessons
Typically, you’ll have 5-10 lessons.
You’ll need an introduction and a conclusion so that leaves 3-7 lessons for the content.
The best way to decide on the lessons is to imagine you’re teaching your topic to your ideal student and just list what they need to learn.
You’ll come up with a list of lessons, what their titles are, what you’ll teach in them and the results your student should get from it.
Step 3: Record the video
Once you know your lessons, it’s time to record.
I know, you might want to write it all out, create slides, think about how to put it all together, but resist that.
This is a “fast course” – all those other things are for when you are ready to do your “good course”.
For now, just turn on the camera and start recording each lesson taking note of timestamp where each lesson starts.
Personally, I use OBS (Open Broadcaster Studio) which is a free software for PC, MAC or Linux/
Don’t worry about mistakes too much, you can always trim those out later.
All in one video – well, you could still do one video per lesson but the problem is procrastination again.
Doing it all in one video will help to force you to just get it done.
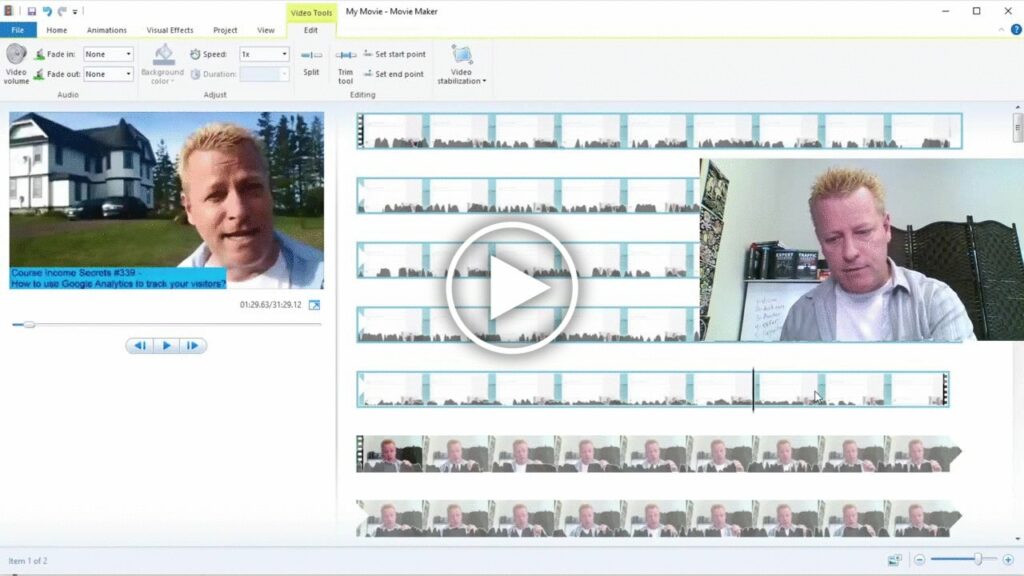
Step 4: Extract each lesson from full video
Now that you have the content for the course in one big video, you need to split it up.
Use any video editor to find the start and end of each lesson to extract them.
Personally, I’ve been using Windows Movie Maker but you can use Camtasia or even YouTube Studio editor.
You might take a bit of time to get this done, but learning how to edit your videos is critical to creating your “good course” later.
Step 5: Create course on hosting platform
There are tons of places online you can host your course so I can cover them here.
You can always do a search for them of use the platform I created, Click eCourse to host it.
On Click eCourse, hosting a simple video course is super easy.
First, you’ll want to register a free account. Just click on the Register at top right of page.
Then click the Continue with Facebook button or enter and email and password.
After that, you can create your course by clicking on the Green plus and selecting course.
Fill in the form with your Course title, summary and details as well as Cover image.
You can edit more of the course details but this is the minimum you’ll need.
Step 6: Add the lessons to the course
After you’ve created the course, you need to add the lessons.
Before adding the lessons, you need to upload them to YouTube.
When ready, click on the + next to the the Lesson link to add a new lesson.
You can then specify the share link of the YouTube video to create the new lesson.
Do this for each lesson. You can also edit the lesson title, summary and details after if you need to.
Step 7: Publish your course
The final step before anyone can access the course or perhaps buy it if you decide to sell it is to publish it.
Go back to edit the course by clicking on the edit button.
Go to the Access tab.
Set the access to something other than New, for example Unlisted allows you to send people a link.
Conclusion
As you can see, there’s quite a bit to learn when creating and publishing a course.
The video shows all this live so you’ll definitely want to watch it to see these steps in action.
Make sure you share this too with your friends. Just click the social icons.