How to create membership site with WooCommerce and Stripe in WordPress?
Someone was asking me the other day how to automate a product purchase with WooCommerce and Stripe.
I thought it was a great question and wanted to find out how to do that.
If you know me, I’m more of an explorer and like to discover new things with an audience.
I know it would be great to have a proper step by step guide to do this, but I’m sure there are hundreds of results if you google the problem.
Follow along my journey to discover how to do all this.
You’ll need a WordPress site
Before you go any further, you’ll need a WordPress site that you can manage yourself.
It’s true that WordPress isn’t super simple to setup but it’s very powerful that same reason.
There are many places to get a WordPress hosted server but you can just get it at Click eCourse.
See the post at http://cis347.jsgagnon.com
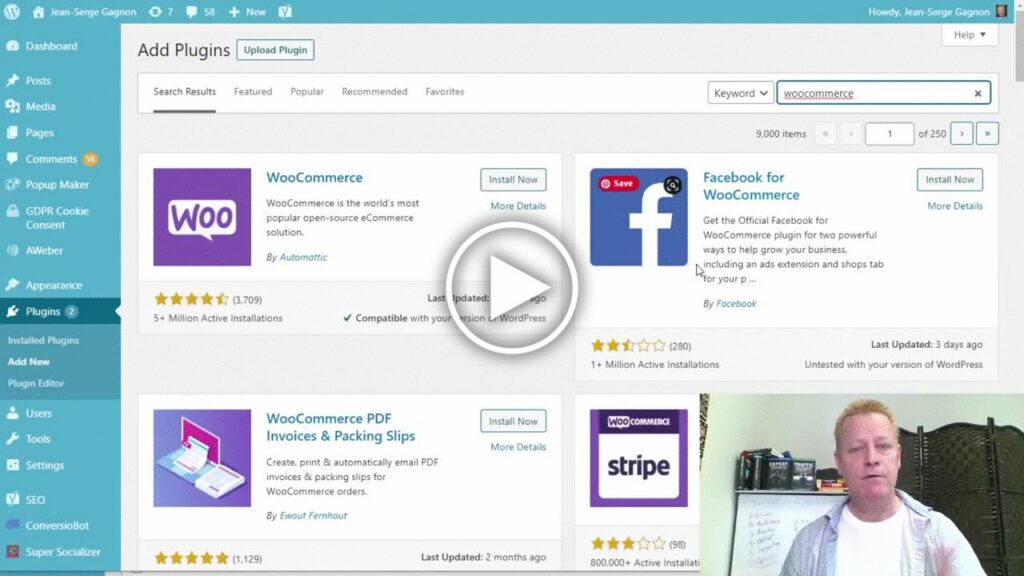
Install the WooCommerce plugin
After you have your WordPress server setup, you’ll need to install the WooCommerce plugin.
Go to the plus manager and click the Add New button.
In the search box, enter WooCommerce
You’ll need to click on the Install Now button and then click the Activate button after it’s installed.
Setup your WooCommerce account
You will be taken automatically to the setup page.
Enter your address and click the Continue button on the bottom of the page.
Next, select the industry you are in. For example, I chose Education and learning, then click Continue.
Next, select the types of products you want to sell.
The free version only allows you to sell physical or downloadable products. If you want memberships, subscriptions or other options, you’ll need to upgrade your WooCommerce account.
We’ll just leave it at only Download and continue.
Then tell them about your business.
I probably should have disabled the Mailchimp and Creative mail options since I don’t plan on using those though.
You can always enable them later.
Next, it will ask for your theme. Unless you are starting a brand new blog, you’ll want to just click the Continue with my active theme button.
Next you are asked if you want to add Jetpack. Personally, I just clicked the No thanks button – you can always go back and add it later.
Finally, you’ll see the Dashboard in WordPress for WooCommerce
Add your product to your Store
On the main page, you’ll see the setup options for WooCommerce.
They’ll be in the sequence that it makes sense to do them with the first of them adding a product.
When you click on Add my products, you’ll be taken to the page where you manage products with a blank page to create your first product.
I chose the Start with a template option and then chose the Digital product option after that.
Enter your product name in the box and then the description of it.
You will also want to change the product image by uploading a new one. Click on the default image and upload a new image – this uses the normal WordPress media manager.
Next, set the product price as well as downloadable files
and the product short description
Save and publish your product by clicking the Publish button, just like any other WordPress page or post.
Integrate your Stripe account
After you have at least one product, you’ll want to make sure people can actually buy it.
Go back to the main WooCommerce dashboard and you’ll see the Set up payments option.
You’ll see a few options, just click on the Stripe one
It will automatically install the WooCommerce Stripe plugin and then you need to connect your account
You’ll see a few prompts to login to your Stripe account
After entering your email and password, you’ll be returned to WordPress WooCommerce dashboard.
If you’d like, you can also setup PayPal for those who’d rather use that.
Conclusion
You’re now ready to accept payments in your WordPress site.
You can find your product URLs to promote under the View link of each product.
In the video, around the 45:30 mark, I also show you where you need to add a webhook to automate your Stripe purchases.
As always, comment below or reach out if you have any questions.
I’d also be eternally grateful if you’d share this post with your friends by clicking the social links.