Navigating the Click eCourse site as a Summit attendee
No matter what web site you go to, there’s always going to be some confusion.
Hopefully, this short introduction to the Click eCourse web site, or platform will help.
I wrote it for those who registered at https://BitCloutVirtualSummit.com but it applies to anyone else.
Just like any other membership based sites, you’ll need to login although you can do lots without that.
In this post, I will be showing you how to navigate as a summit attendee or a student of any course.
How do you become an attendee?
Becoming an attendee is as simple as registering your new account.
You can do that by clicking the Register link anywhere you see it.
There’s also some sneaky magic available with an API (programmer stuff) that allows someone to create a opt-in page with click funnels which I did for the summit.
With the API, when you enter your email in the funnel, your account gets created as well.
You’ll get an email with a link to activate your account.
Note that using Facebook to login doesn’t require you to activate account by email.
Navigation basics
As an attendee of the summit, the link you get in your email is a direct link to the summit.
The simplest thing for you to do is click on the big pink Start here button.
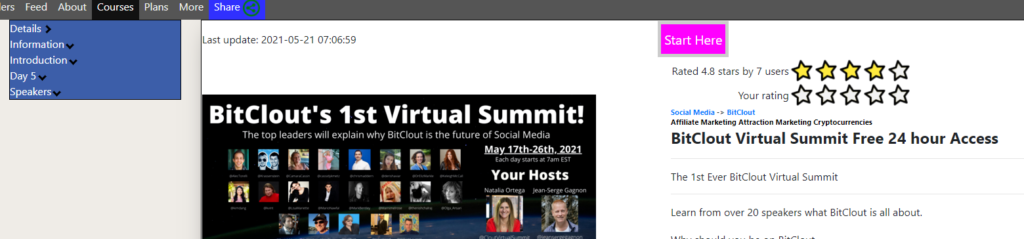
This will start playing the first video in the summit which explains some the very basic of navigation on the platform.
After clicking that button, the first video will start playing.
If you do nothing, the next video will start and then the next and so on until the last one.
Controlling playback
When the video starts playing, you can do a number of things, such as:
- Pause or resume playback
- Switch to full screen
- Go to next video (or previous)
- Download video (if available)
- Turn off auto advanced to next video
- Mark the video as “done” (or new if already marked done)
Of course those are pretty basic and simple but it may be important to mention that if you pause playback, the system remembers exactly where you left off so you can return to it.
It even lets you switch devices or computers.
For example, you can watch a video on your phone on the bus and when you get home switch to your computer and it will continue where you left off.
The navigation menus
There are a number of menus in the system to navigate around.
- Attendee menu (also called course menu or summit menu)
- Platform menu
- Account menu
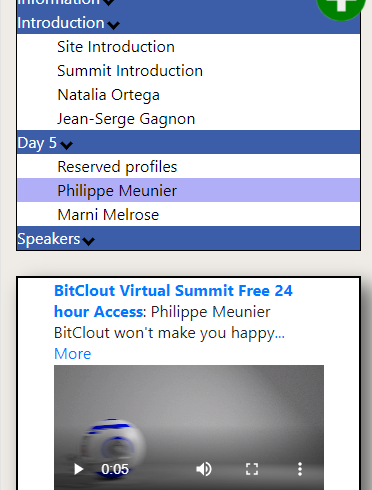
The attendee menu will show up on the right side on desktop and is where you can find details about the course or summit.

For example, this is the menu when accessing Day 5 of the summit. As you can tell, you can expand the menu by clicking on the blue rows with a down-arrow on them.
On mobile, this menu shows up before the viewing area instead of to it’s left.
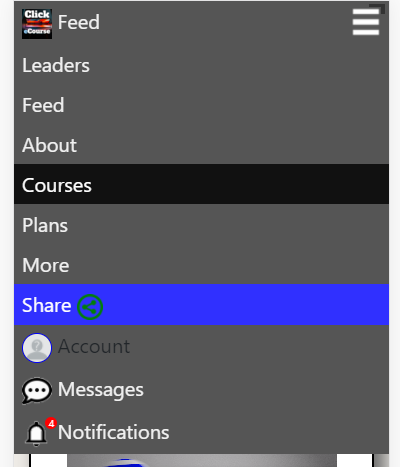
The Platform menu is what shows up on top of the screen on Desktop.

It is used to access other areas on the platform, such as the About page, the Leader board, the feed and the courses.
On mobile, it collapses to a hamburger menu you need to click to access the items.

And when you click it on mobile, it opens up to the same menu items.
Lastly, the account menu is what shows up when you click your profile picture on very top right.
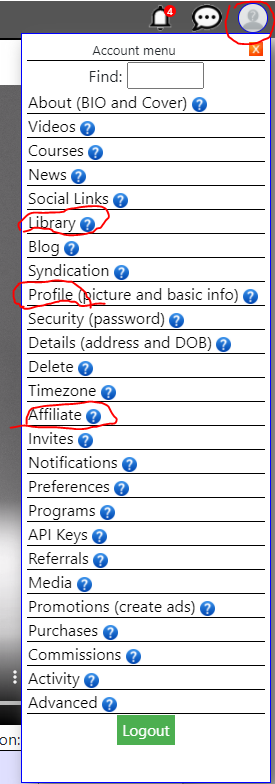
As you can see, there’s an awful lot of things you can do, so let’s just leave it at the 3 you might be interested in right now.
- Library – this is where you see your courses or summit you are part of
- Profile – this is where you can set your picture, name and BIO
- Affiliate – this is where you can become an affiliate of the platform and earn income.
I won’t get into details in the blog because I do cover what most of this is in the video, so go watch that.
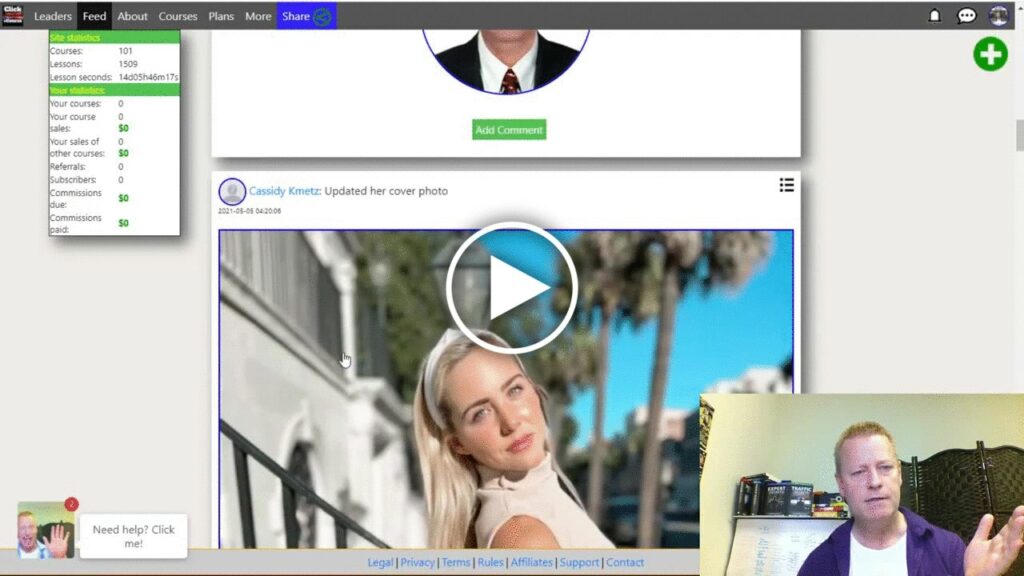
Comments and feed
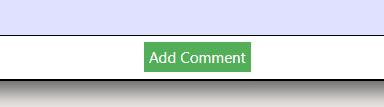
As you navigate the site and the videos you’ll notice there are comments you can add.
You can also reply to comments.
Just click the comment button to get started.
After which , the comment text field show up where you can type it in and then click the Save button to save it.
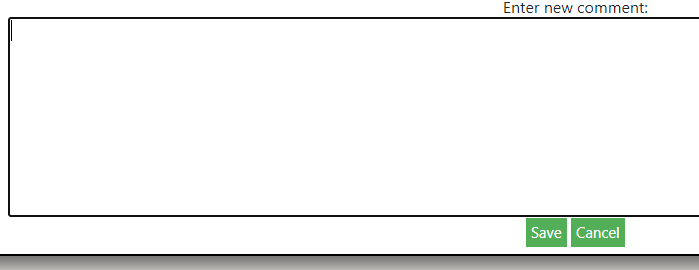
You can put urls in your comments and they will be “linkified” since you can’t put html code and you can also put emojis.
When yo post a comment, students are notified and it is added to the feed events.
The feed is accessible with the Feed platform menu item and it’s where you’ll see things like course ratings, comments, new courses published, lessons added to courses, users changing their profile picture, etc.
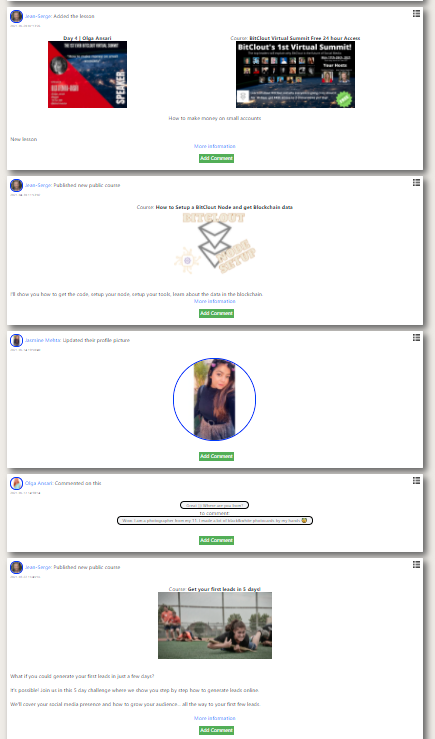
There’s a lot you can do there – and there is more coming like groups, pages and integrations as well.
Conclusion
Even though it’s not rocket science to navigate a web site, it’s become more and more common to make it dead simple for users.
I’m sure you’ve been to websites with tons of options and you just give up because there’s too many things you can do.
We all want super simple – ABC 123 type of stuff on web sites.
Click eCourse platform is still growing but I hope it’s getting better.
Watch the video to see this all in action.
Also make sure to share this with anyone who is an attendee or even just a friend by clicking the social icons.