How to create a course from a pre-recorded video?
So you have a video that you showed how to do it all and you want to create a course from it?
You could just upload that video to YouTube and give people the link to it.
Then you tell them to go to 12:15 for step 4 and 35:22 for step 8, etc…
That does work, but it’s a lot better to have separate videos.
Deciding on the course structure
The first thing you’ll need to do is decide of how many parts you have and split the video up.
In my case, I had recorded yesterday’s episode with the goal of creating a course with it.
If you watched it (or listened to it), you will recognize that I also explain that in it.
You’ll usually have at least an introduction and a conclusion and a few lessons in between.
How to split a video
There are lots of tools out there that let you split a video into parts.
You can even do it on your phone.
I won’t cover the tools since there are so many, but they are all very similar in the sense that you just need the start and end times.
Me, I’m a geek, so I use a tool called FFMPEG and CYGWIN on my PC.
I also use that in Linux too and I show you how I did it.
Using the geek method
For completeness sake, I’ll give you the command I use.
It’s basically this
ffmpeg -i INPUT -c copy -ss START -to END OUTPUT
Where INPUT is the input mp4 file, START is the start point in the video (like 12:33), END is the end in video (like 14:55) and OUTPUT is the output file.
For example, I could do this:
ffmpeg -i create-course-full-video.mp4 -c copy -ss 1:15 -to 2:45 1-introduction.mp4
ffmpeg -i create-course-full-video.mp4 -c copy -ss 3:02 -to 5:55 2-register-account.mp4
ffmpeg -i create-course-full-video.mp4 -c copy -ss 7:19 -to 12:15 3-setup-profile.mp4
ffmpeg -i create-course-full-video.mp4 -c copy -ss 13:45 -to 18:31 4-become-affiliate.mp4
After which I uploaded them to YouTube as unlisted videos.
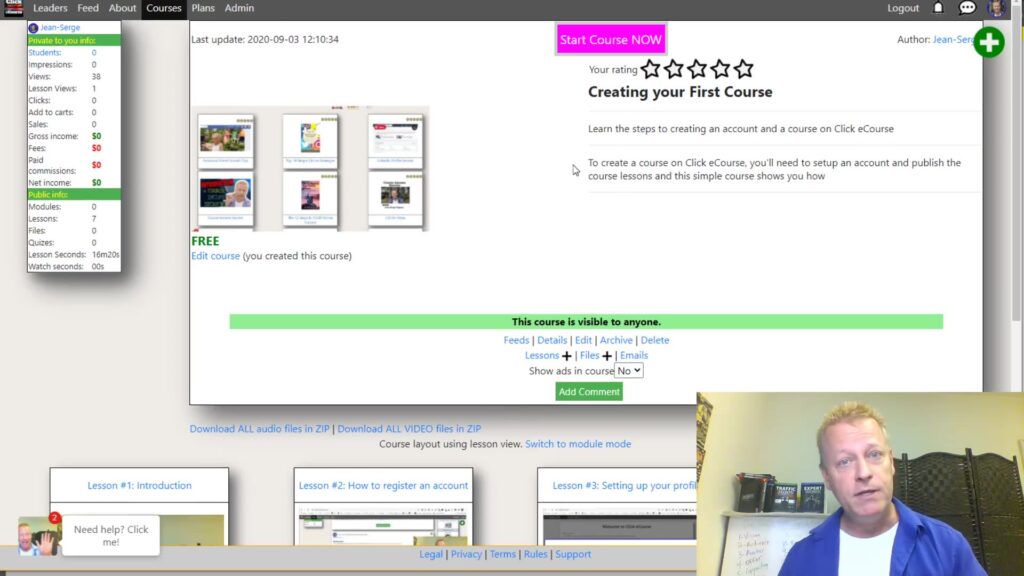
Creating the course
The course is the container that will house the lessons.
You give it a name, a summary and some detail text.
Also, you decide if it’s free or your students have to buy it.
There are other options as well but you need to create the course before you can add lessons to it.
Adding the lessons
Adding the lessons is as simple as pasting the YouTube link
For each lesson you want in your course, find the URL for the video in YouTube and paste it in the URI field.
When you save the lesson, the platform will download the thumbnail, title, video and audio from it.
You can then publish the lesson and the course.
Conclusion
The great thing about creating a course like this on click eCourse instead of just sending the full video to your students is that they will find it a lot easier to follow along.
They will be able to go back to lessons without having to know where to go in the big video
It also allows them to keep track of where they are in the course and you to track how many students you have.
I trust you found this useful and will share with your friends.