How to publish a Simple Online Course using full video?
Creating your first online course should not be a monumental task.
I used to think I needed to create a perfect course so that I could sell it and make tons of money.
Maybe you think that too and I certainly would love for you to accomplish that.
However, you might find that doing that requires learning a lot of things or spending lots of money hiring people to do it for you.
If you’ve got the time or money, this blog post is not for you and that’s ok.
What is a Simple Online Course?
What I mean by simple online course is that there’s no complicated sections and chapters or equipment needed.
You’ll get there soon enough but for now, we’ll talk about a course that is simply a bunch of lessons.
To make even simpler, we’re talking about that course that you create from a single video.
Sure, you can record multiple videos, do a bunch of takes and take more time to perfect the recordings but we’re here to go through the process faster to learn all the other pieces you need to know.
Recording your course in single video
In the previous episodes, we actually recorded a course and then split out the lessons.
You can check out those other blogs too
- Course Income Secrets #420 – What is Easiest and Fastest way to record Simple Online Course?
- Course Income Secrets #421 – How to Extract Lessons from Full Video to Create Simple Course?
Those two blog posts talked about recording a course in one video and then using tools to extract the lessons from that long video.
If you haven’t done that yet, go do that now as the rest of this blog post will assume you have the lessons extracted from your full recorded video.
Creating a simple course on a platform
No matter what platform you use, creating a course involves at least these basic things:
- Your course title
- Your course summary
- Your course detail text
- Your course thumbnail
- Your course price
Most platforms then force you to decide on sections and modules which is certainly great to organize and allow your students to better navigate the course.
In the case of Click eCourse though you can just add lessons to your course.
Using Click eCourse to create basic course
Since I created this platform, that’s the one I use and teach about, so let’s get to it.
To use the free account on Click eCourse, you’ll need to first upload your videos to YouTube, Vimeo or Facebook as public videos (must be unlisted on YouTube or Vimeo)
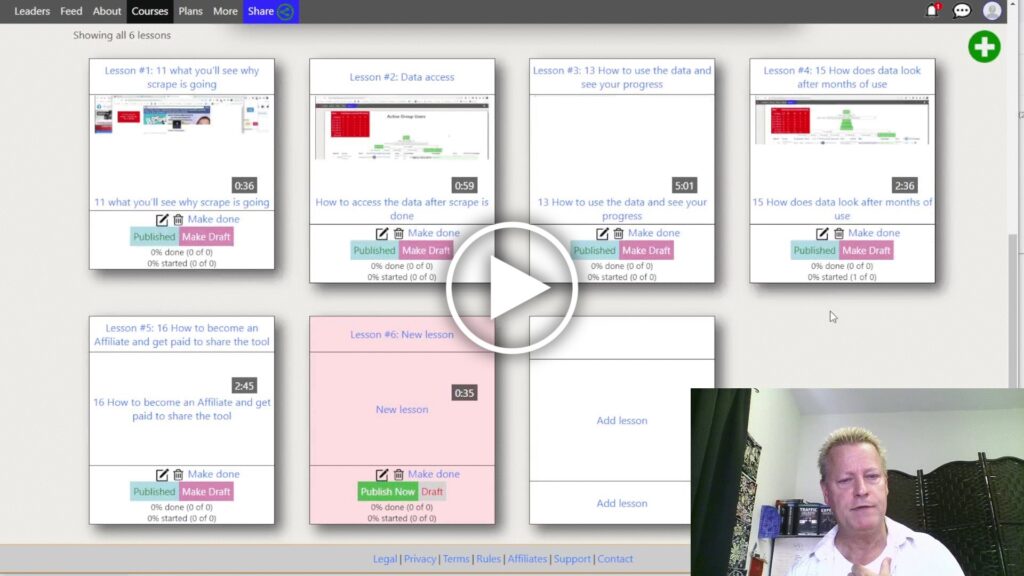
After creating the course by entering the title, summary and details along with uploading thumbnail, you’ll be able to add the lessons.
Each lesson has it’s own title, summary and details as well as it’s own thumbnail.
Just enter that information along with the video URL for each lesson.
Lastly, publish your lessons and the course.
Conclusion
I know this seems too simple to be true and it would be nice to have a bunch of screen shots showing you how to do this.
I actually have tons of other blog posts showing how to do all these things. Just click on the Click eCourse category in the categories list of my blog.
If not, you can simply watch the video to see how to do all that and follow along pausing the video as needed.
I’m sure many of your friends would love to see this too, so they’ll appreciate it if you share it with them – and I will too of course.