How to create and use Facebook video viewer audiences?
It’s really the best way to use ads on Facebook if you are doing videos.
Creating and using a Facebook video viewer audience is the fastest way to get people to know, like and trust you.
Most platforms have the concept of video viewer audiences and on Facebook, they are called custom audiences.
With custom audiences on Facebook, you can create a bunch of different audience types.
Such as event based, leads based, app activity, website visitors and more.
Where to go to create a video viewer audience?
There’s always changes to Facebook platform and this may have changes since I wrote this article, but you’d think that the Page’s Ad tab would allow it but nope.
You actually have to navigate to https://business.facebook.com to access the more advanced audience creation page.
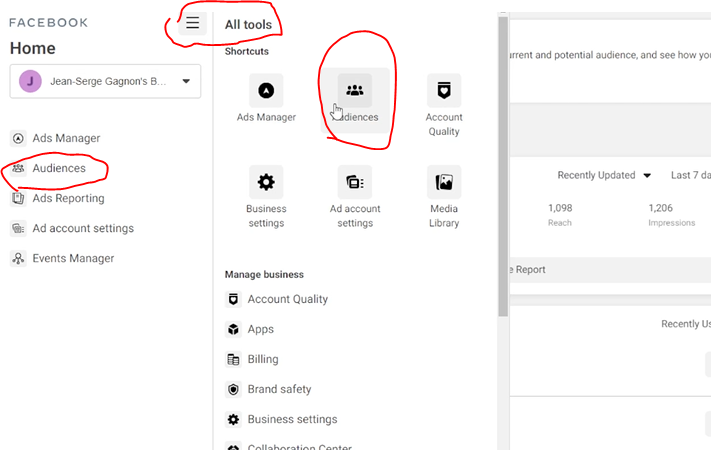
Once there, you can create the new audience.
First, you need to have a video to create audience from
Before we get into creating the video viewer audience, let’s consider the video you need.
I’ll have to admit right here that I’m still not the expert at creating content that is aligned.
Sure, I do these weekly videos on Course Income Secrets, but that’s a big enough topic that I struggle choosing one to promote.
Recently though, I have been working on my Active Group Users Chrome Extension and so, that’s the topic I choose these days.
In any case, you need to have a video that you can choose as your “audience building video” since when you create the audience or “viewers of your video”, it needs a video to put in there.
Hope you get my overly detailed explanation lol
Create your video viewers audience
Now that we cleared that up, let’s actually create the video viewers audience.
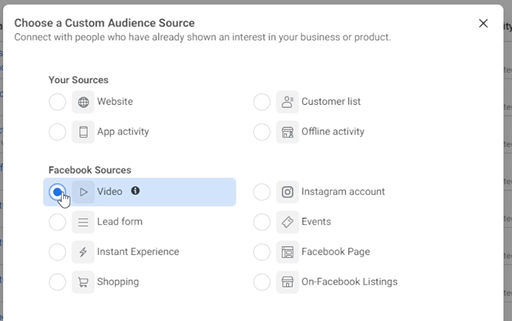
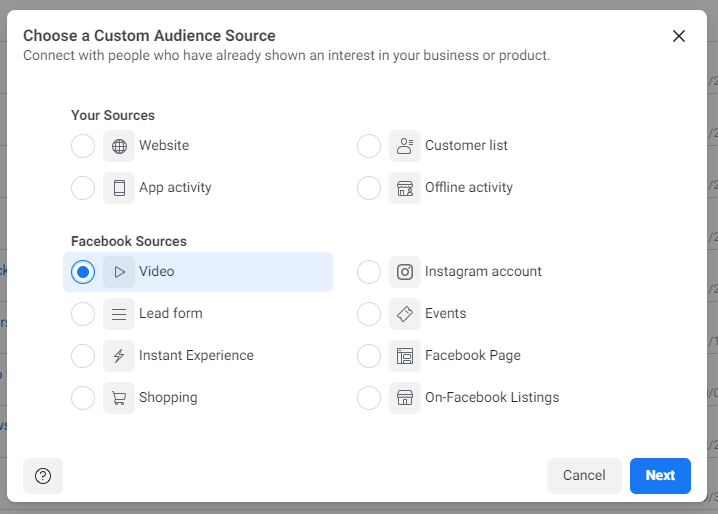
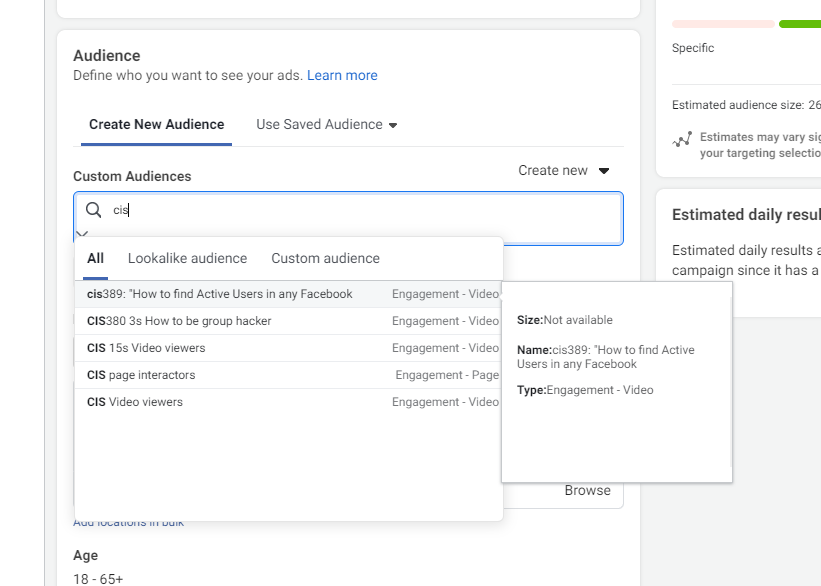
You should already be in the Audiences page of the business manager, so click on create audience button and select Custom Audience.

This will popup a list of possible audience types where you want to select Video and click Next.
After that, you can enter the audience name, choose the type of metric to use to add people to it and the video(s) to use to build the audience.
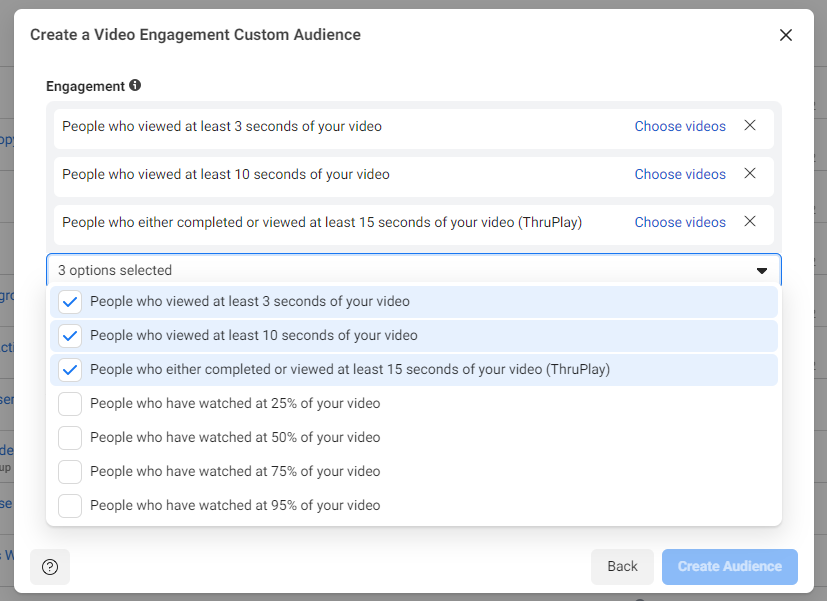
You can choose videos from a Page or an Instagram account (if it’s a business Instagram account) and you can select between 3s of view time up to 95% of video viewed.
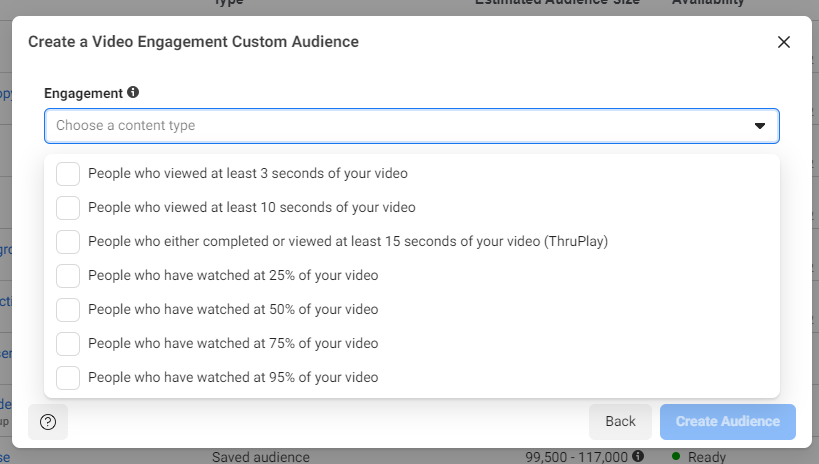
You can even create the audience based on different videos watched a different amount of times.
It can get pretty complicated but imagine being able to target people who watched 15 seconds of video 1 and 50% of video 2 and video 3.
But let’s keep it simple, we’ll do 3 seconds of a single video for this audience.
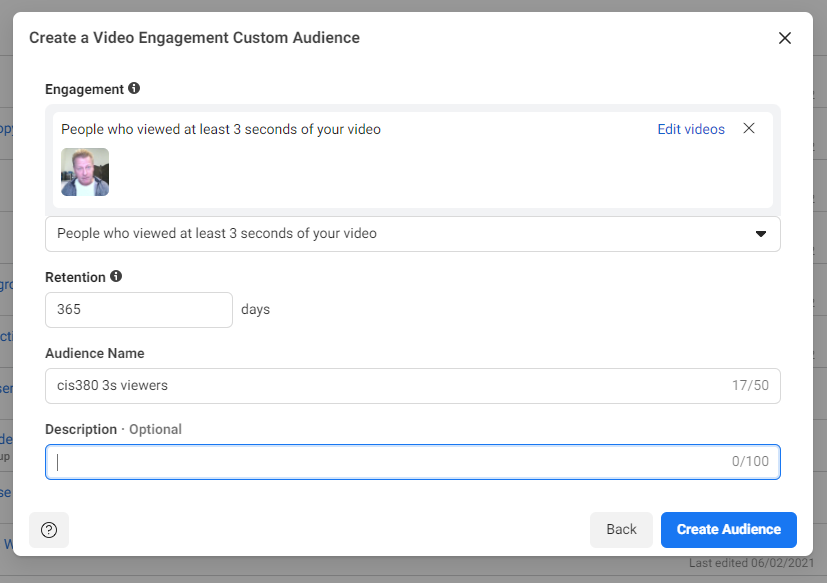
After entering the audience name, you can click on Create Audience button which will start populating it.
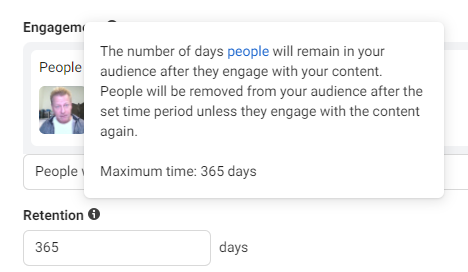
One last note about the Retention, I keep it at 365 days when I start out but you may want to change it to 30 or 90 days once you get lots of viewers since someone who saw your video 6 months ago probably has no idea who you are.
Growing the video viewer audience
Before you can use the audience to promote anything, you’ll want to grow it.
This audience will grow every time someone watches the video you chose.
You can use ads to grow the audience faster by promoting it to a an audience of people that match your avatar for example.
Me, I’m in the network marketing, attraction marketing, course creation and online marketing space, so I create ads that promote to people in those interests.
I won’t go into details on creating ads to those types of audiences here, but you can watch the video below for how to do that too.
Using the video viewer audience to promote an ad
The next thing you’ll want to do is create an ad that uses that audience.
To use the audience, you need to create a new Saved audience and use this custom audience as it’s “seed”.
First, go to your Ads manager (you can use Boost post as well, but I like to go to Ads manager)

Click on the big green button to Create a new Ad
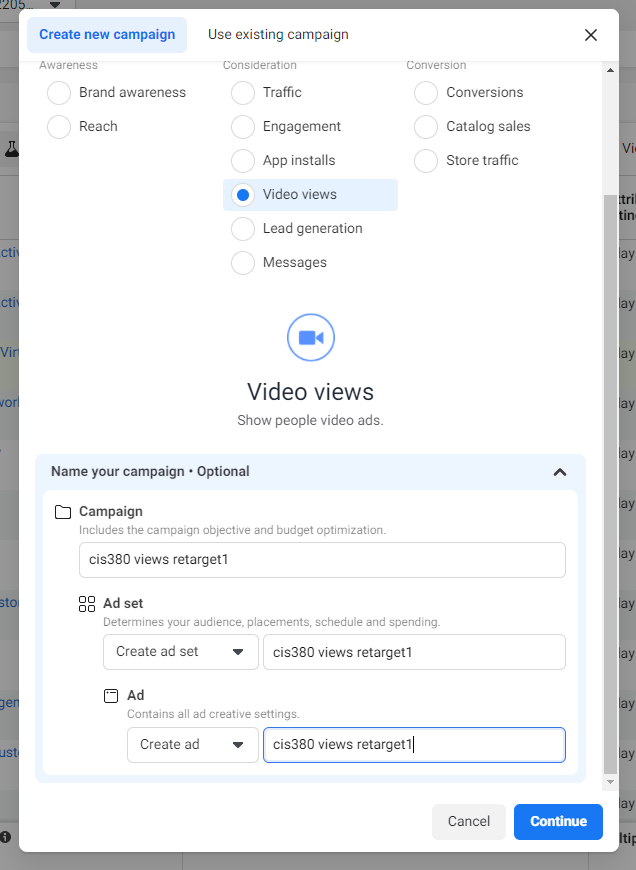
Which will popup the options for what your campaign goal is. You can choose any option here, even video views if your goal is to get them to watch a different video.
Optionally, you can set a campaign name and choose to create a new Ad set and a new Ad – I like to set that each time and give them all the same name to make it easy to find them later.
When you click on Continue, you’ll see the edit ad popup where you can edit the campaign, the ad set and the ad itself.
The campaign is where you set your budget, the ad set is where you choose where it will be seen and the audience and the ad is where you choose the content to show.
Personally, I like to start with the smallest daily budget I can choose – for us Canucks, it’s $1.40 a day but in the US it’s $1 a day – not sure about your country if you are somewhere else.
Once you’ve set your budget, click the Ad set selector or the Next button on bottom right.
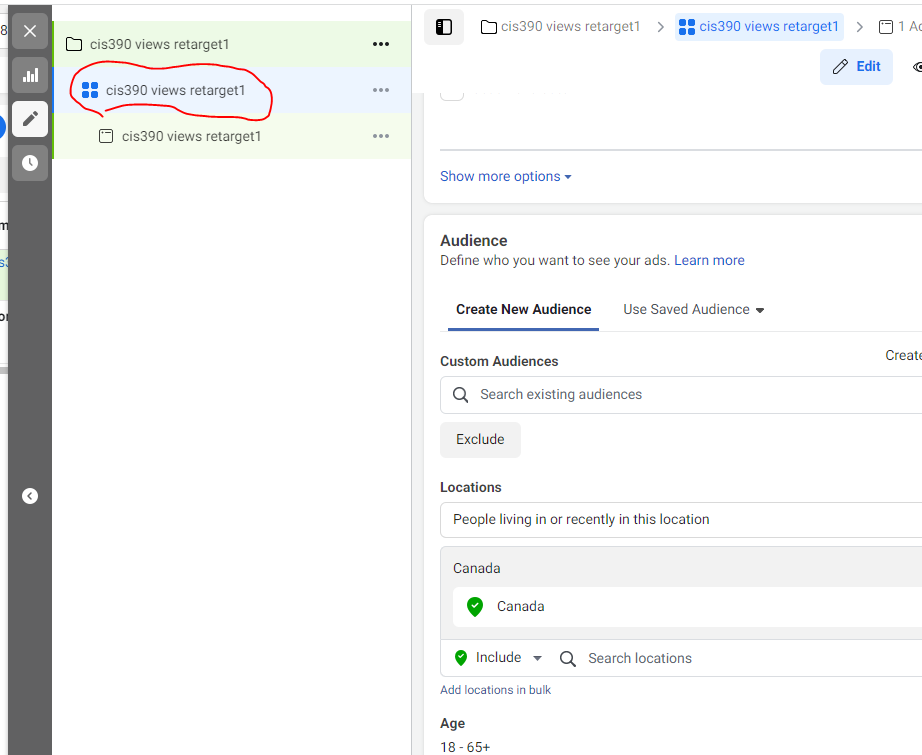
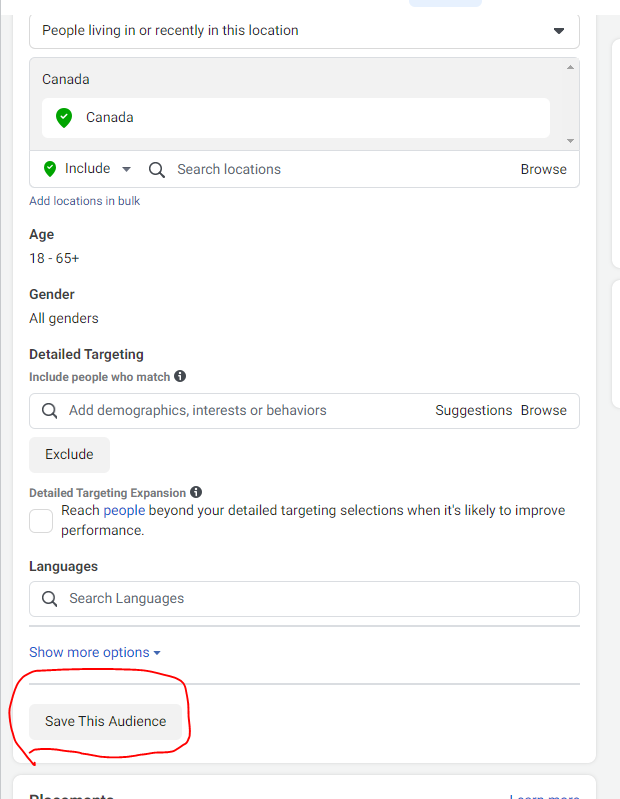
From there, enter your new video viewer audience name in the Search existing audiences box under the Custom Audiences label and select it.
Next you’ll want to set or remove any additional targeting depending on your goals and finally save your audience.
After that’s done, you go to the Ad section and create the ad content.
I’ll usually create an ad from an existing post but you can create a new ad and a new post right from the ad creation page.
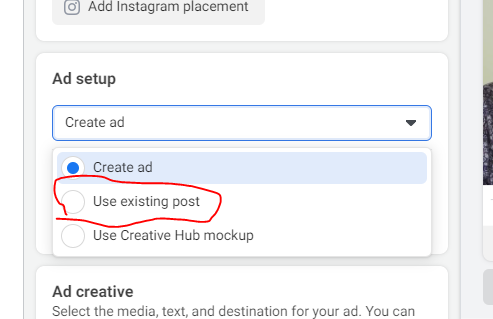
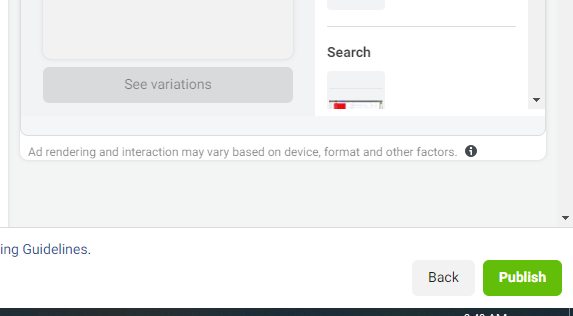
And then you choose an existing post to create the ad with to finally click the Publish button
Conclusion
Keep in mind that creating ads on Facebook isn’t going to generate any income unless you have a full value ladder created with follow up email sequences, capture pages and funnels to sell something.
As I mentioned in my last post, Course Income Secrets #390 – Top 5 things to know when creating Facebook Ads you should not sell anything in a Facebook ad.
It’s not something you should be doing until you have a massive audience and they know you well enough to buy from you directly in Facebook.
In any case, make sure to watch the video to get more insights into this huge topic.
As always, I appreciate you sharing this post and video with your friends using the social sharing icons.