How to use New Snapchat Timeline recording?
Have you heard about the new timeline feature in Snapchat?
It’s really cool and because other platforms add a watermark to your videos, Snapchat is the only one that doesn’t.
Personally, I’ve been using Snapchat since 2016 to grow my audience.
Back it’s it’s days of being the only story platform, I grew a big audience but since Instagram implemented stories, I’ve been using it more for content creation.
Why use Snapchat anyway?
Today, I only get about 30 views on my stories in Snapchat, so it’s certainly not the reason I use it for.
For me, it’s because I can use the video recording tool in a way that’s better than all the others.
Here’s a table to compare Snapchat to Instagram, Facebook and TikTok for Stories and Reels:
| Feature | Snapchat | TikTok | ||
| Post stories | yes | yes | yes | yes |
| Reels/videos | no | yes | yes | yes |
| Max story length | 60s | 80s (4x20s) | 20s | 60s |
| Max reel/video length | n/a | 90s | 30s | 300s |
| Adds watermark to story download | no | no | no | n/a |
| Adds watermark to reel download | n/a | no | no | yes |
| Face lenses/filters | millions | thousands | thousands | thousands |
| Can switch lens while recording in story | new | no | no | yes |
| Can add music in story | new | yes | yes | yes |
| Add disappearing text in story | new | no | no | yes |
So, for me, it’s always been about the 60 second videos that I can create, download and then upload elsewhere.
Should you repurpose same video?
That’s a great question and the truth is that’s it’s certainly better to create unique content for each platform.
Like this would be ideal:
- Record 60s story video for Snapchat
- Record 80s story video for Instagram
- Record 20s story video for Facebook
- Record 60s story video for TikTok
- Record 60s Reel video for Instagram
- Record 30s Reel video for Facebook
- Record 60s video for TikTok
Doing each with the platform’s recorder and uploading that way would be the best approach.
But, seriously, who has time for that? I mean, it would take at least 20 minutes a day.
Even though that doesn’t sound like a ton of time, there’s so much more to do in a day.
I know I don’t, so I do the next best thing – I record once and then shares everywhere.
Why Snapchat over others?
Of course, you could use Instagram’s Reel recorder or TikTok to record and then share.
For me, the watermark TikTok adds makes it not the best to share elsewhere.
Although some people might think it’s great that they advertise they are also on TikTok, most leaders agree that content should, at the very least, appear to be native on the platform it’s posted.
As for using Instagram Reels to create main video, I find Instagram has a lot less filters than Snapchat.
Now with the new timeline recording and the disappearing text, it’s even more awesome.
What is Snapchat timeline recording feature?
If you’ve used TikTok to record a video, you’ll be very familiar with this.
Up until now, when you record a video with Snapchat, you press the record button and when you let go (or you reach the maximum length), that would be it, you’d post it (or save it).
But now, with the new timeline recording feature, you can let go of the recording button after a few seconds and you’ll see a new little + next to it.
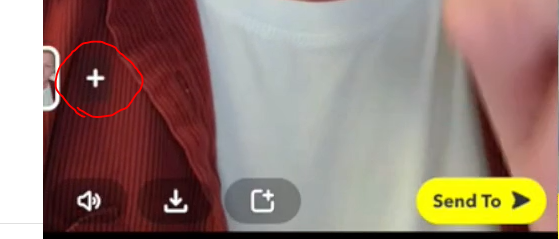
Once you click that little plus, you enter the timeline mode and you’ll see your camera turn on again and a small yellow line at bottom of page.
You can then record a new video snippet to add to your recording.
You can also add a pre-recorded video from your media folder too which is unique to Snapchat.
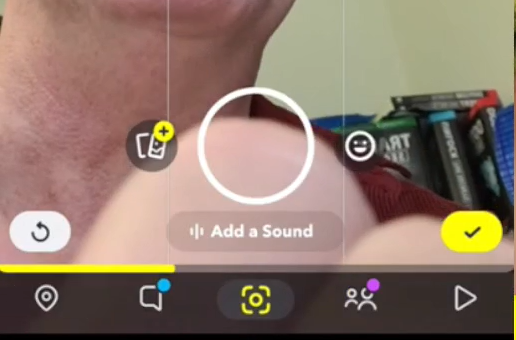
As you record a new snippet, you’ll see the yellow line move forward until it’s 10 seconds long, then it will show a new line until you reach 60 seconds.
At anytime between recording each snippet, you can activate the lenses options by clicking the little face next to the recording button.
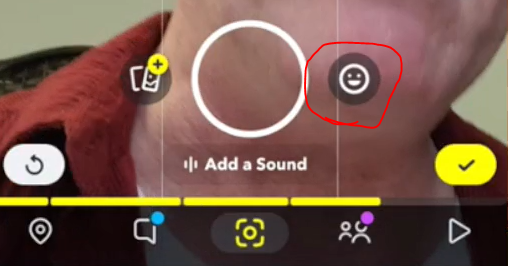
Which will show the popular (or promoted) lenses first, you can choose any by clicking them or scroll sideways to see more.
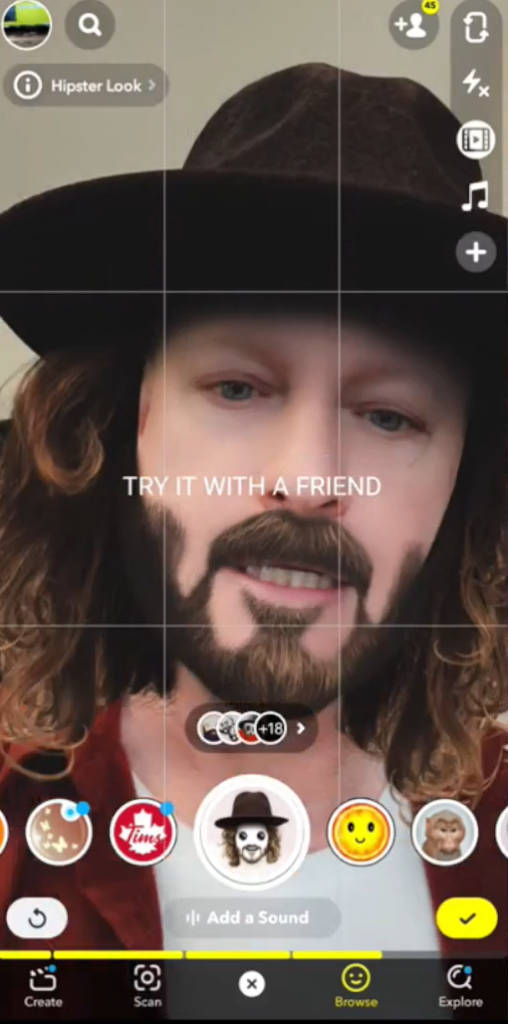
You can see on top of page the name of the lens and if you record while it’s active, you will see that face on your recording.
Have fun and explore them.
How to save your Snapchat video?
After you’ve completed your video, you’ll want to save it before you post it.
Actually, you don’t even need to post it to Snapchat if you aren’t building an audience there.
Personally, I post it because, well, why not, right?
Anyway, to save it, click the little down arrow pointing to a box.
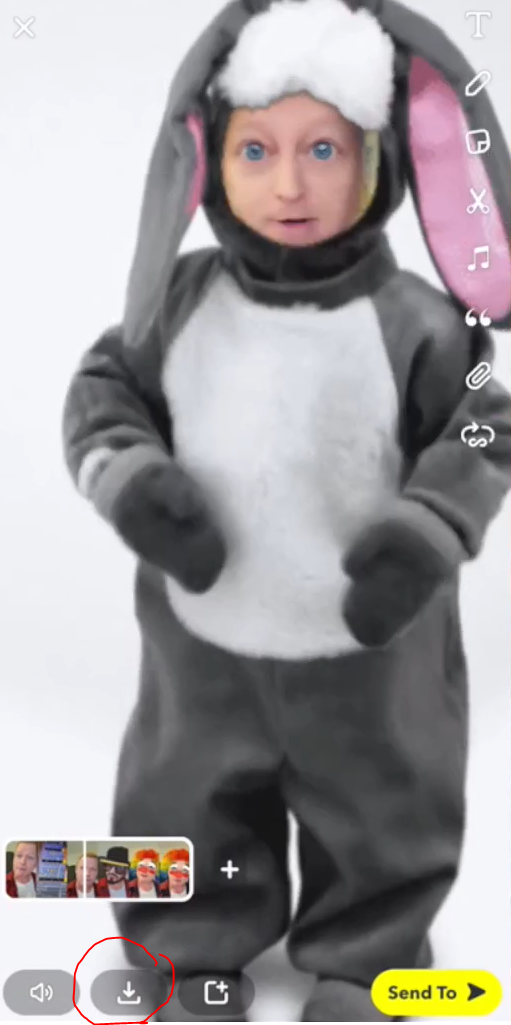
This will save the entire 60 second video to your camera roll.
If you forget to save before you post it, you’ll need to save the 6 individual 10 second videos and join them with a video joining tool because Snapchat splits it in 10 second story videos.
Conclusion
I have to say I was pretty excited to see the new timeline recording feature in Snapchat.
Sure, I’m having fun with using different filters throughout the recording, which wasn’t possible before, but that’s not the main thing I’m excited about.
I want to be able to be outside, record a 10 second into, then move somewhere else and record some more and finish in front on my computer and conclude the video.
Until now, that would only be possible if I started the recording outside and walked fast enough to get in the house, up the stairs and sit at my computer all while recording the whole thing.
Checkout the video though as I go into more specifics and you’ll see examples of this process.
Share this with your friends who love to save time by clicking the social icons.