How to setup your Active Group Users Account?
So you got your new account on Active Group Users, now what?
If you don’t know Active Group Users is a software that finds the most active users in groups of your choice on Facebook.
You can learn all about it in the next live or replay webinar at https://AGUdemo.com so make sure to register there.
Also, if you don’t have the time to watch that webinar, then you can get yourself a free 14 day trial at https://ActiveGroupUsers.com but you’ll be giving up the free 90 days you get by attending the webinar!
What can you do with Active Group Users account?
Even though Active Group Users is a chrome extension software that will find the most active users in any Facebook group you choose, there’s another side to it all.
The main thing is that you will definitely want to tell your friends about this software or about the demo webinar.
Of course I’d be delighted if all your friends came by and started using the software too.
Truth be told, if you’re using this software, chances are you are an online marketer and you will welcome being rewarded for spreading the word.
Setting up the extension
Before we get into the account setup, let’s just get you started.
Even though this post isn’t about setting you the extension, let’s go through those steps to make sure you’re setup.
Setting up the extension is very simple and involves these steps:
- Add the extension to browser (Chrome, Microsoft Edge, Brave, Opera or Vivaldi)
- Connect extension to your account
- Add Facebook groups to extension
That’s pretty much it, let’s talk more about these steps.
Extension Step 1: Add extension to browser
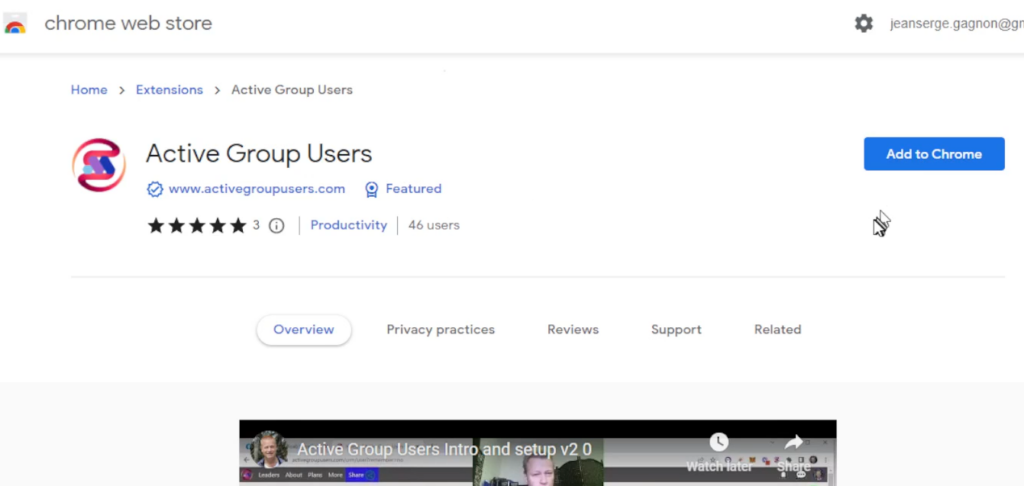
To add the extension, it’s as simple as visiting the Chrome Store extension page and clicking a button.
Go to http://download.activegroupusers.com/ and click the Add to Chrome button
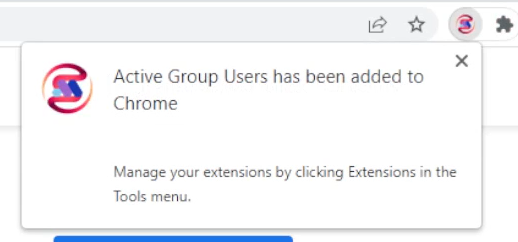
You’ll see a warning popup about the permissions the extension needs and you just continue by clicking the Add extension button.

Which will then show you a popup that it’s been installed.
Extension Step 2: Connect extension to account
Assuming you’ve already activated your account by clicking the link in the email your received, the process is quite simple.
Otherwise, you’ll need to register an account at this time and you may continue after doing so.
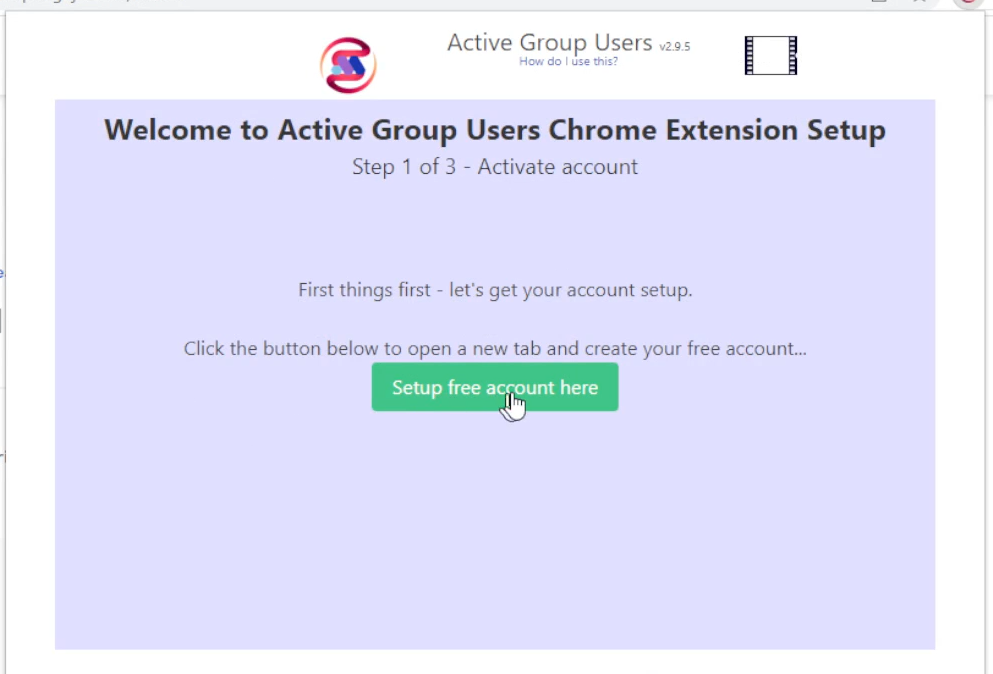
Simply click on the extension icon or the puzzle piece and then the extension.

Which will popup the initial wizard setup for the extension. Click on the Setup free account here button.
Which will show you a message about your account already being setup and to click the extension icon again for step 2.
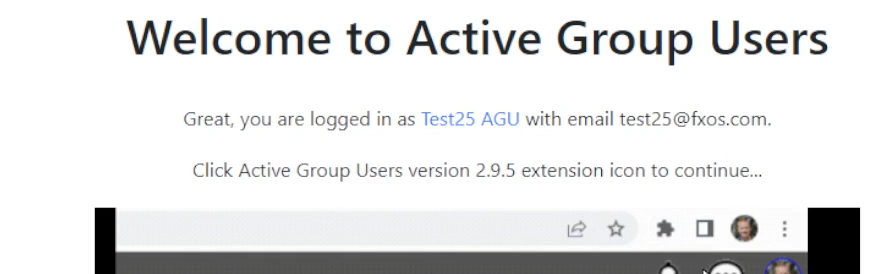
When you do that, you’ll see it tells you that your account is now setup and to click on the Next button.

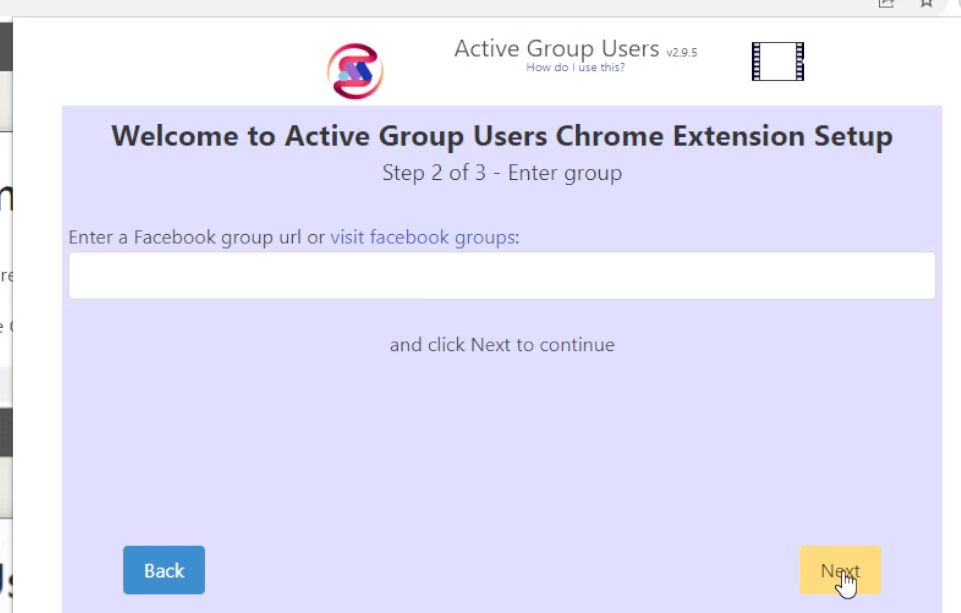
Then you’ll see a box to enter a Facebook group – you can simply click the Next button as you can enter groups later.
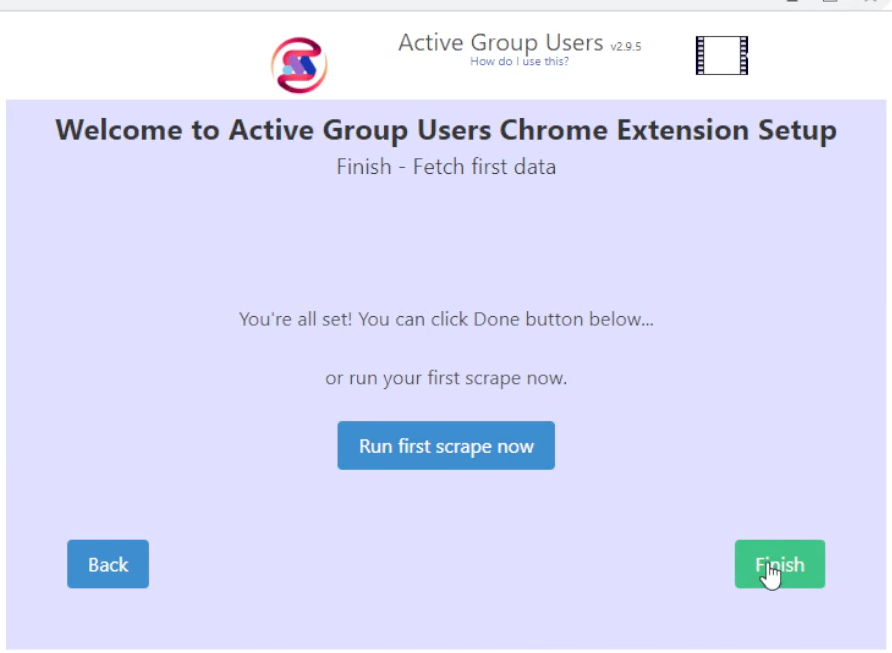
At which point you can click on the Finish button.
Extension Step 3: Add the Facebook groups
At which point you can enter your first group and you’re all setup.
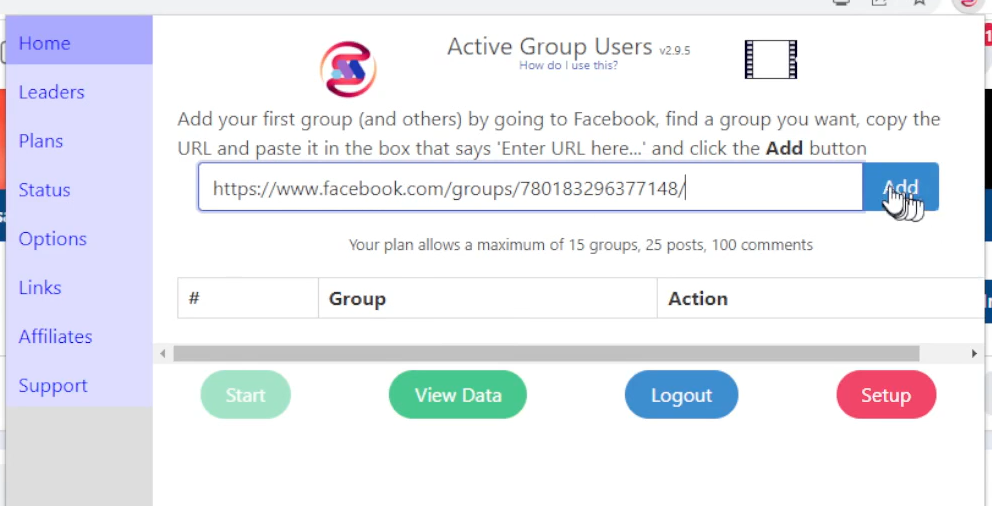
You can add more groups depending on the plan you have – 3 groups is maximum for trial account but if you attended the demo, you’ll have the gold plan which allows up to 15 groups.
Setting up your account for referrals
All right, so now you’re using the extension and loving it (of course right?) so you’ll want to tell all your friends about it!
As much as I’d love you to do that for free, I suspect you’d love to be compensated for your efforts.
I’m happy to give you up to 50% commissions as long as you setup your account for it.
To do that, you simply need to do the following:
- Prepare profile
- Add your social links
- Enable affiliate status
Let’s go through those now
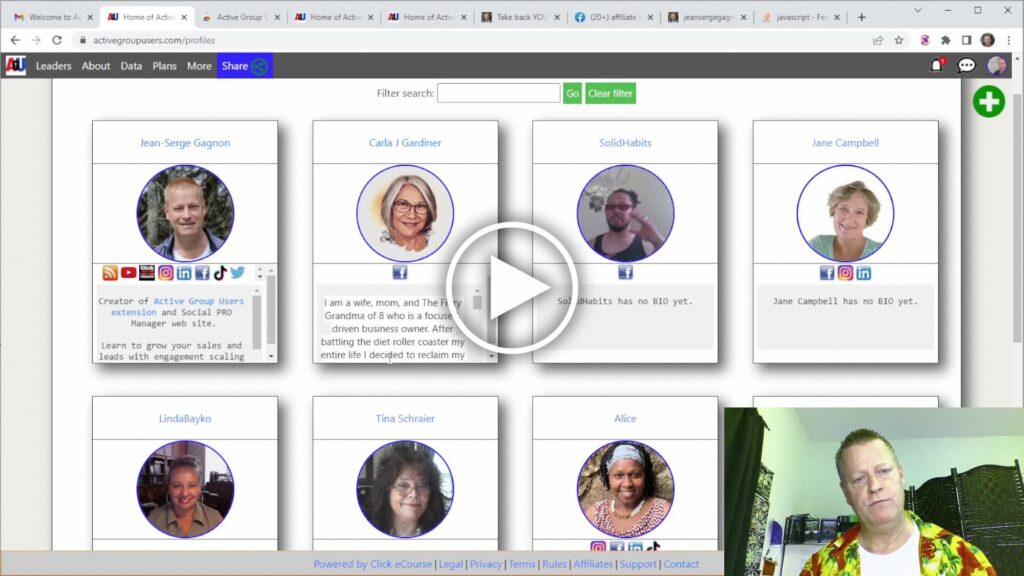
Account Setup Step 1: Prepare profile
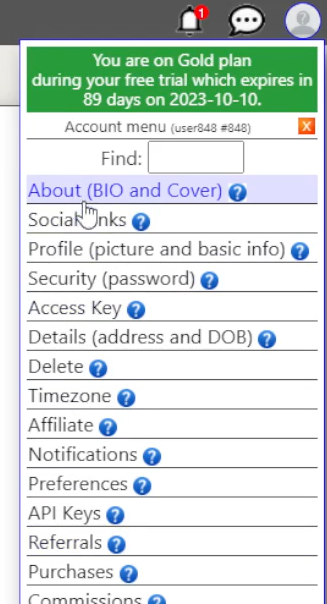
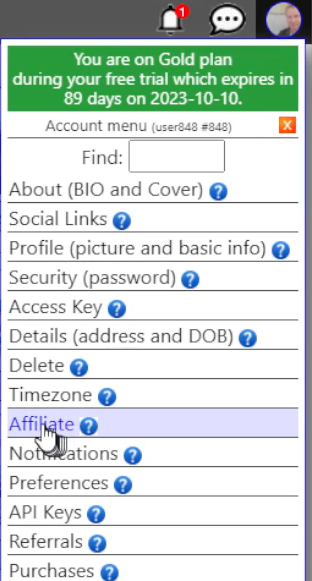
To add your profile picture, a cover photo and an engaging BIO, you’ll want to open the account menu.
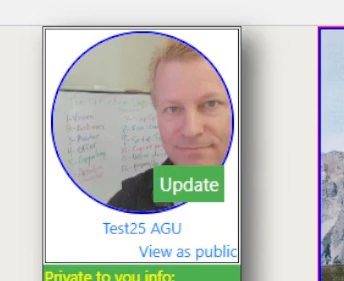
Just click on the profile icon on top right of screen and then click the About (BIO and Cover) link in it.
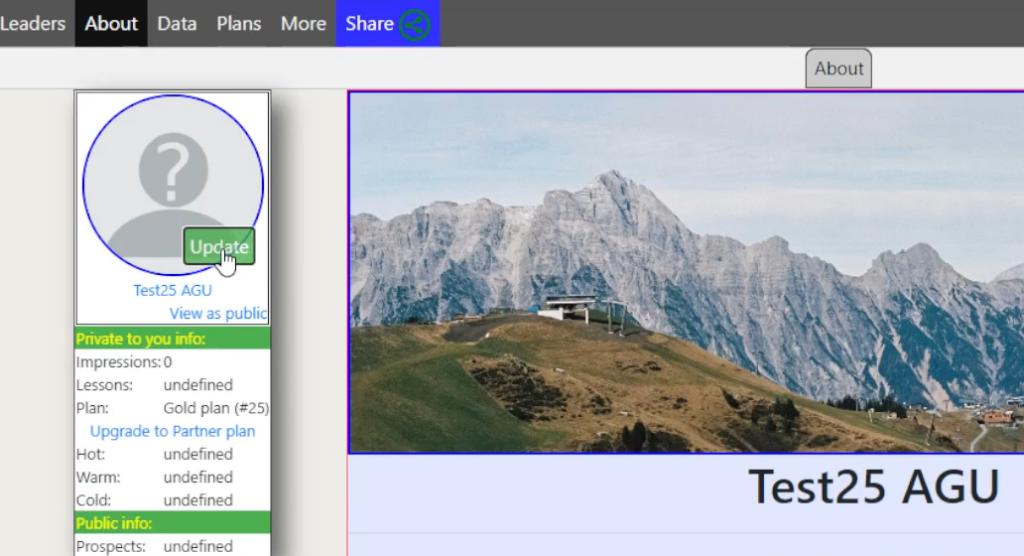
On the next page, you can upload your profile picture by clicking the Update button right next to it.
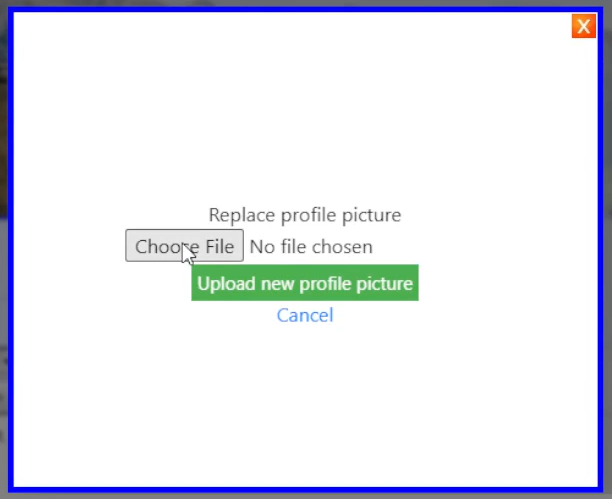
This will popup an upload dialog where you click on the Choose File button
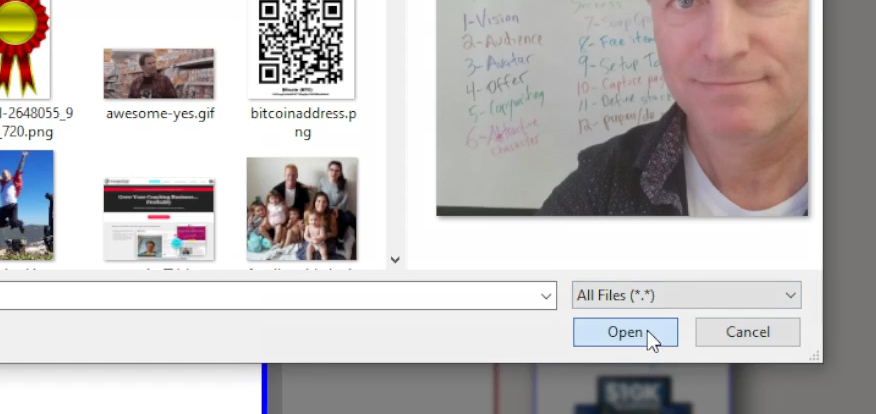
After which you will be presented with the file selection window, select a file and click the Open button.
And lastly, click the Upload new profile picture button.
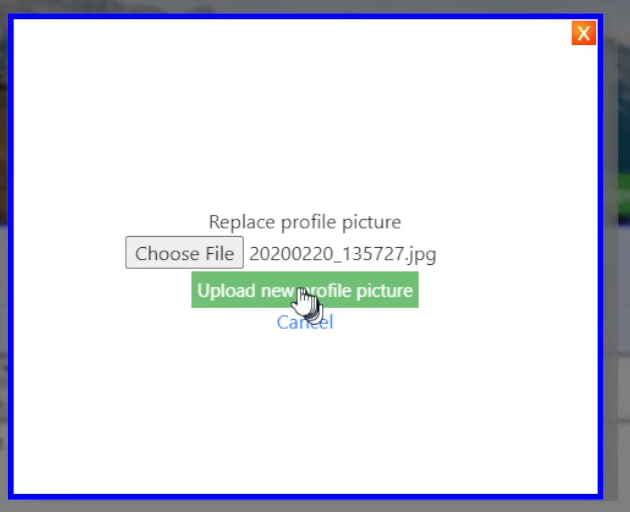
This will automatically update your profile picture on the site.
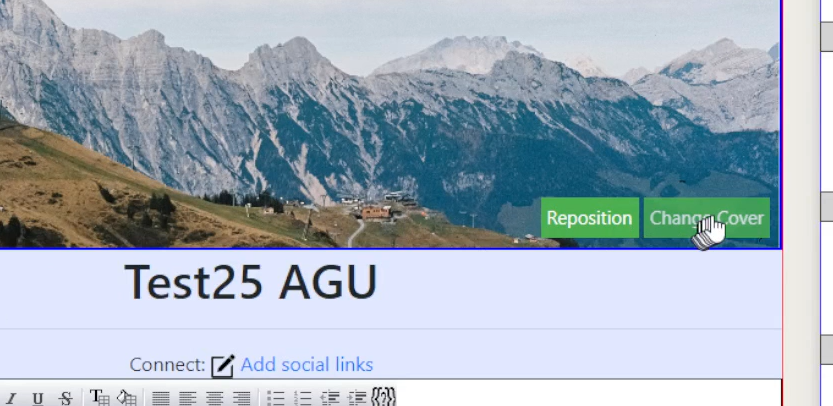
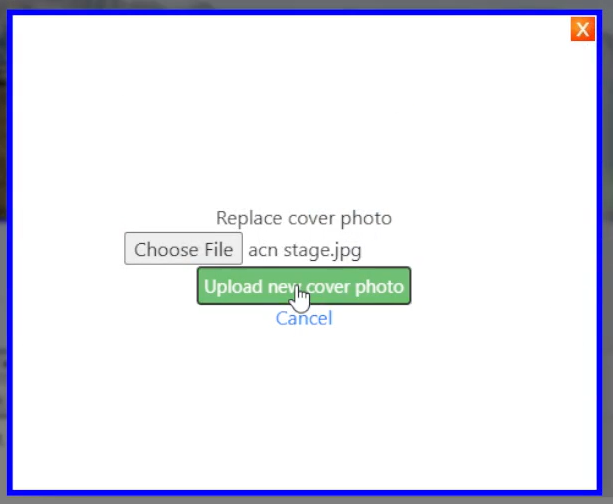
Next you do the same with the cover photo by clicking the Change Cover button.
And follow the same steps by clicking Choose File, selecting it, clicking Open and then finally the Upload new cover photo button.
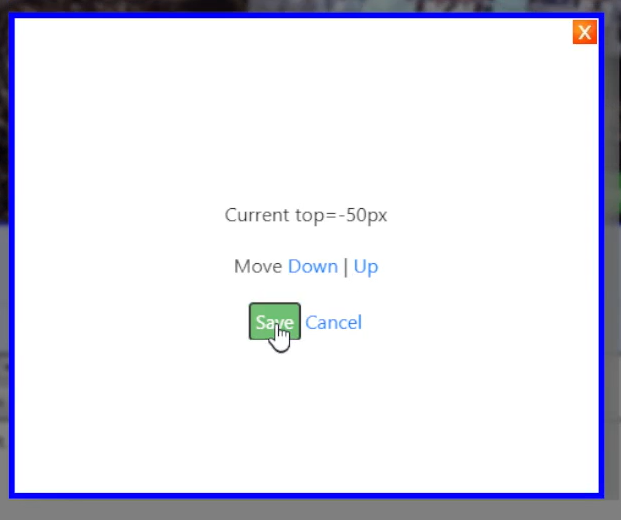
You can then reposition it to fit the viewport better by clicking the Reposition button.

And then the Up and Down to finish with Save button.
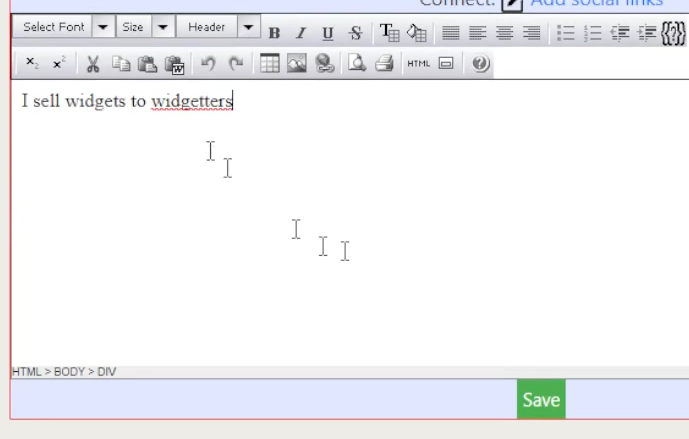
Lastly, enter your BIO and click the Save button.
Account Setup Step 2: Add social Links
As an online marketer, you want to make sure your prospects can find you on whatever social platform they like and you are on.
With Active Group Users, you can add as many social links as you’d like.
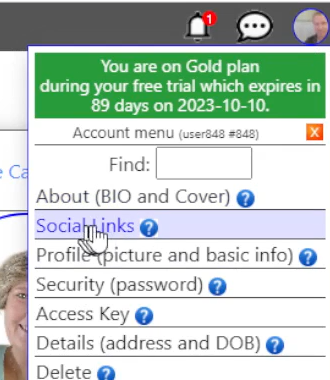
Just click the Account menu and then Social links option.
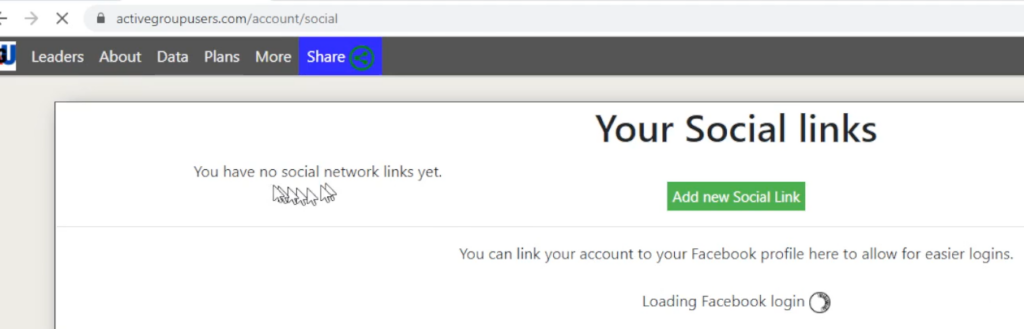
Which will take you to the Social links page where you will see you have none.
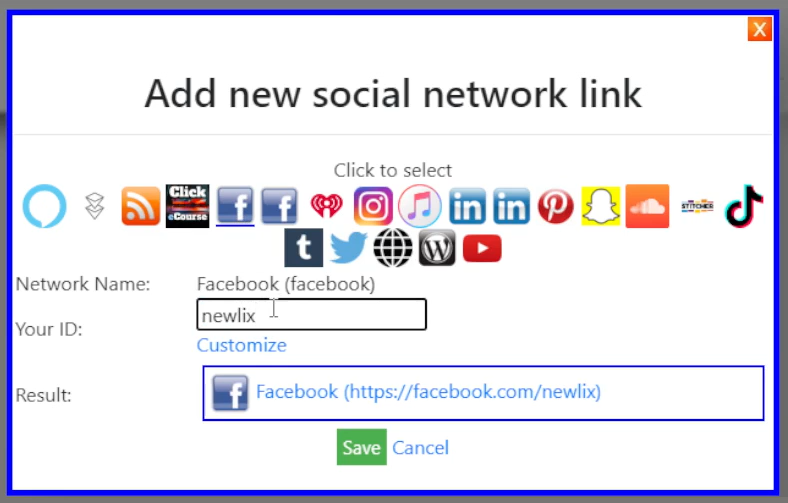
Click on the Add new Social Link button to get started.
This will popup a busy dialog but it’s relatively simple. Just click the icon you want to add and enter your handle in the Your ID box and then click the Save button.
Keep adding them until you have all the social links you want and then you can sort them using the little arrows in front of them.
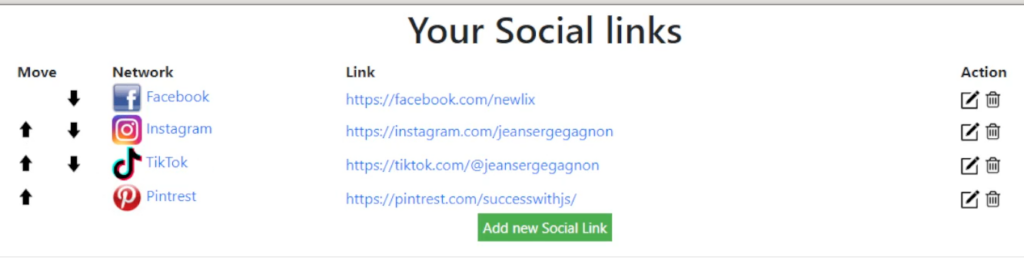
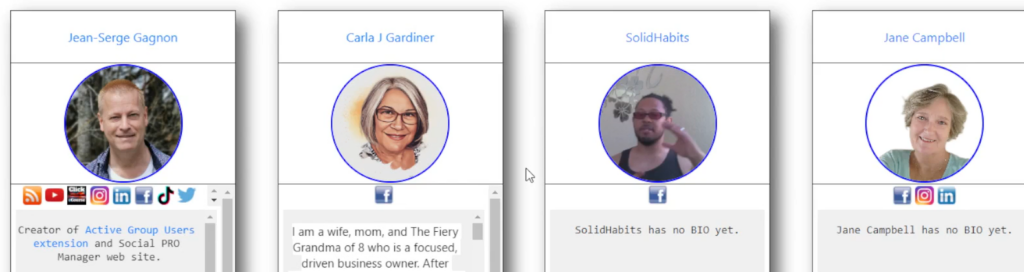
This will then show up over your BIO in your about page and the public profiles page.
Account Setup Step 3: Enable affiliate status
The last step is to enable your affiliate status.
Go to the affiliate setup by going to account menu and selecting Affiliate option.
Which will take you to the Affiliate setup page.
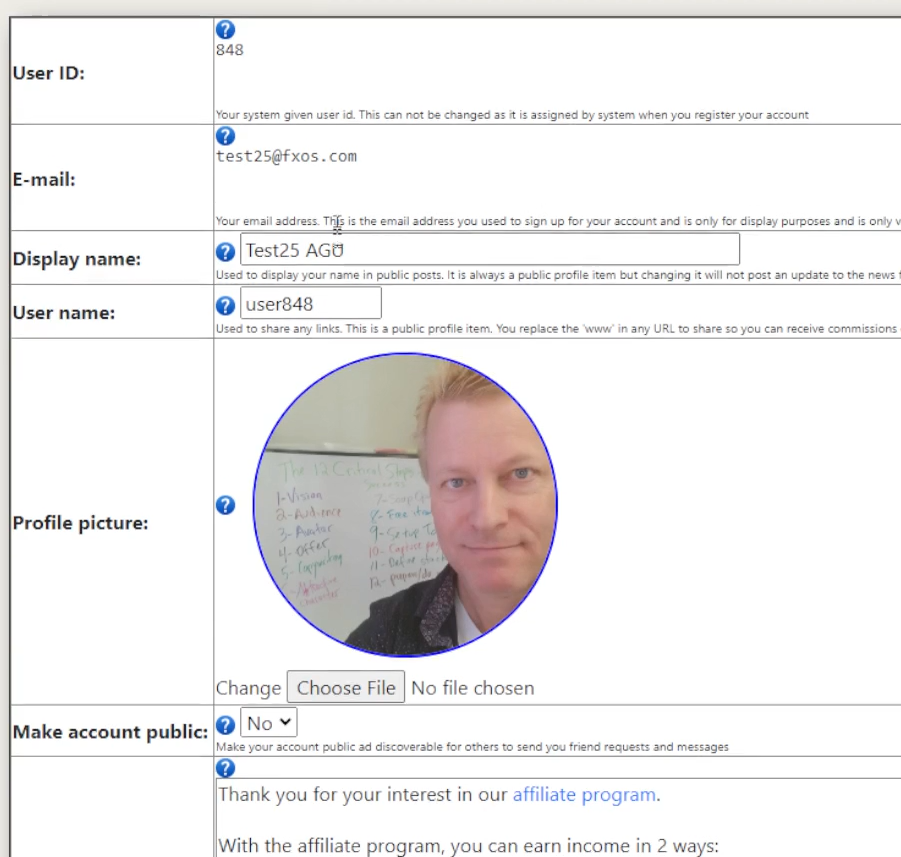
Scroll to the bottom of the page to see what you need to complete (it will be in red)
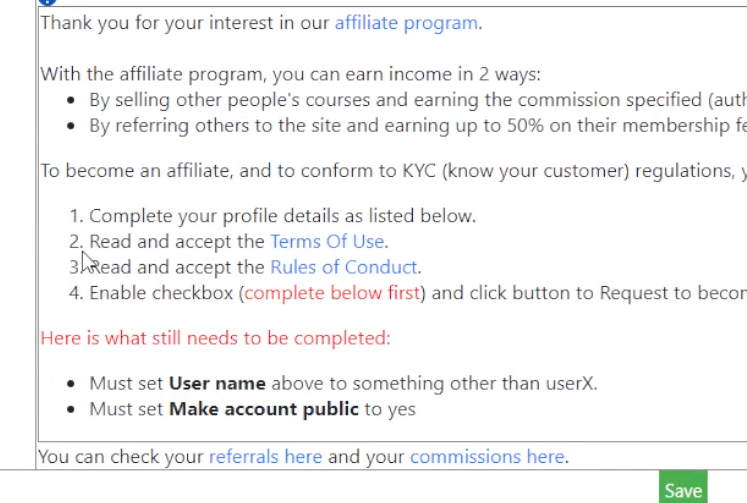
In this example, you’ll need to change your username and make your account public, then click the Save button. After which the option to become affiliate will be available.
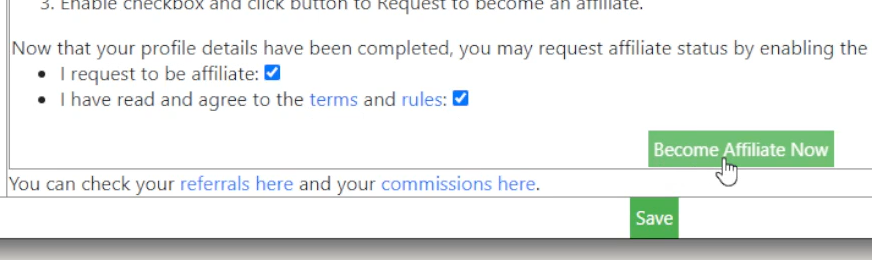
Just click the two checkboxes showing you agree with terms and rules and click the Become Affiliate Now button.
Congratulations, your account and extension is now setup!
Conclusion
We’ve covered a lot in this blog post even though it’s 3 simple steps.
You definitely want to attend the demo at https://AGUdemo.com for your chance to get free 90 day account too.
I invite you to watch the video to see more details and watch me set up an account live.
Don’t forget to share this with your friend by clicking to social icons.