How to Create Your Own Random NFT Collection?
As an entrepreneur, it’s pretty much impossible to not know about Cryptos and NFTs.
The problem with Cryptos and NFTs is that it’s so very hard to know the difference between real a fake offers.
I know it’s easier to just ignore all the Crypto and NFT space but don’t tell me you aren’t a little curious about some of it.
In this blog post, I’ll be explaining what an NFT is, what a random collection is and how to create your own, so let’s get going.
What is an NFT?
As you have no doubt heard, and NFT is a Non Fungible Token which basically means something that is unique and can’t be exchanged for something else.
To keep it simple we often compare an NFT to a painting from famous artist, like the Mona Lisa.
That painting is unique and only one person can own it, just the same an an NFT.
Each NFT is unique, even if they all look the same, like tickets to events for example, only one person can own a particular NFT.
What makes NFTs super interesting for entrepreneurs is that you can attach a creator royalty to it and each time the NFT changes hands, the creator is automatically paid that royalty.
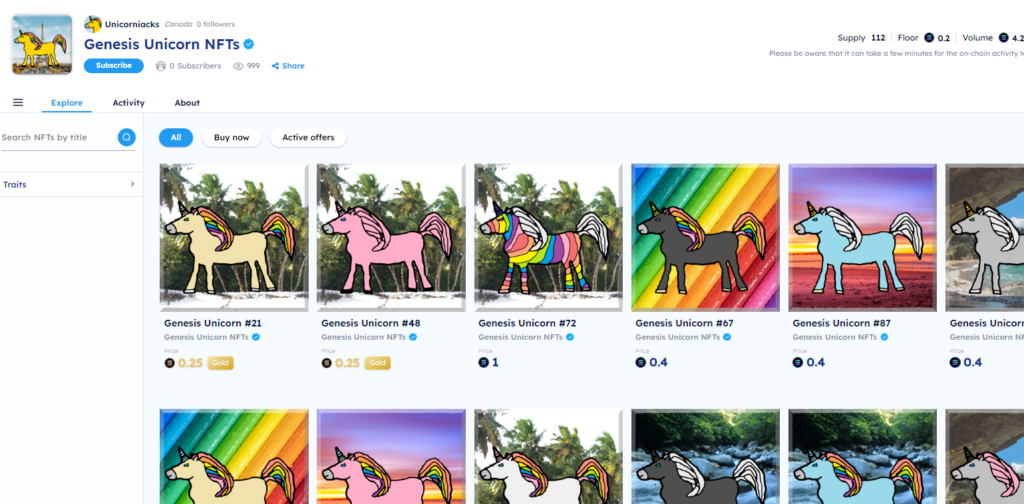
For example, I created the Genesis Unicorn NFTs and will receive 5% royalties on every 3rd party sale as well as my initial sale price.
What is a random collection?
NFTs are used for lots of different purposes such as event tickets, group membership perks, course sales, art as well as collectibles.
A collection is a series of NFTs that belong to a group, such as the Genesis Unicorns which is a collection of 111 unique NFTs.
You could create, and many do, unique art pieces one by one using drawing tools that you then publish one by one.
I don’t know about you, but I feel I don’t really have the time to create 1000 or even 100 unique pieces of art!
A random collection is created using layers and a program to create unique pieces of art.
What are layers and traits?
You create the art for each layer and tell the program how many pieces you want and how many pieces will have each trait.
For example, say you want to create a person collection with different color shirts and hair.
You might have 5 different shirts (red, blue, yellow, orange and black) and 3 different hair colors (black, blond, grey) with 20 pieces in the collection.
Then you could say that 5 will have the red shirt, 5 blue shirt, 3 yellow shirt, 5 orange shirt and 2 black shirt) 10 will have blond hair, 5 will have black hair and 5 will have grey hair.
The program will create a unique image with all that data ensuring there are no two pieces alike.
Why would you want to create your own random collection?
You might be thinking that sounds like a lot of work and it is some work, but probably less than it seems.
But, the great thing about it is how a creator gets royalties forever!
Imagine being the creator of the CryptoPunks, a collection created in 2017 that now sells for 60+ ETH per piece.
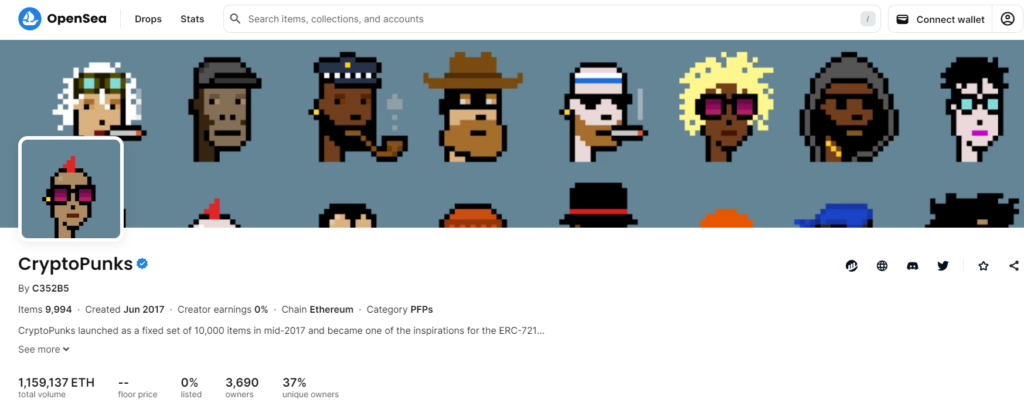
If you had set the creator royalty to just 1%, if someone sold a CryptoPunk for 50 ETH on July 31st, 2023, that would be $93,033 and you’d get $930.33 as the creator!!!
Imagine having a dozen sales like that going on every day!
You can’t tell me that as an entrepreneur, that doesn’t sound like an amazing opportunity!
Creating your own random collection
All right, let’s do it!
All you’ll need is a name, how many pieces in collection and the layers as PNG images.
The layers are also referred to as traits or attributes such as hair color, eye color or clothes.
You should have enough traits to make collection nice and random as well as enough values per trait based on how many pieces you want in your collection.
For example, if you have 2 traits each with 5 values, that’s 5×5 or 25 different permutations, so if you want 100 unique pieces with your collection, you need more than 2 traits of 5 values.
Basically, the math is simply trait1count x trait2count x trait3count [ x traitNcount…] so if you had 5 traits with 5 values each, you could create a collection of up to 3125 (5x5x5x5x5) pieces.
Anyway, boring math aside, you need to create your layers.
Creating your layers or traits for your NFT collection
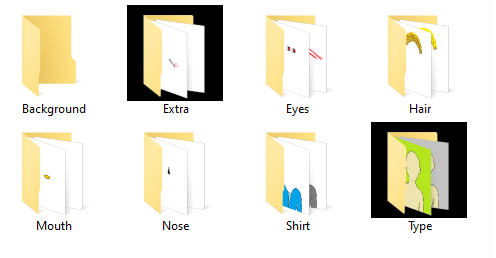
Let’s take the example of creating a human face and upper body.
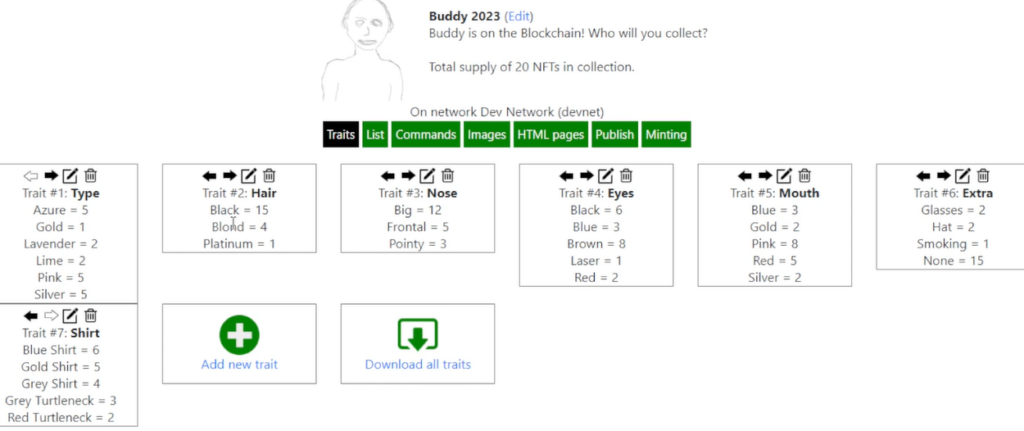
In that case, you might decide to have the traits Hair, Eyes, Mouth, Nose, Shirt and Type along with a Background which you’d organize in a folder with each trait as it’s own sub folder in it.
You can use many tools to do this but a very simple way is with Windows Paint. Just start with your basic design and save that as your base.
Then edit that base, removing everything that’s not part of that layer (or trait).
As an example, for the mouth, you would erase everything except the mouth and save as many versions of the mouth you want to have as mouth variations.
You do the same for others like the shirt – you erase the head and make different shirts you want.

After you’ve created all the layers (traits) you are ready to create your collection.
Creating your random collection on My NFT Engine
You can surely find other tools and platforms out there to create your random NFT collection but I’ll show you how to your My NFT engine – contact me to get an invite to the platform.
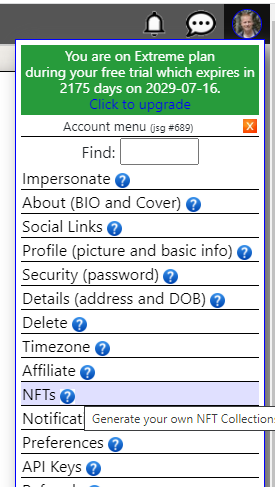
After creating your account, you go to the NFT collections page to create your collection.
Click the profile icon and then the NFT option to go there.
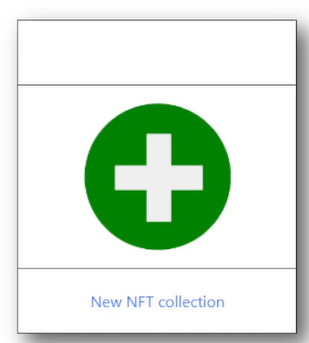
Next, click on the big green plus that says New NFT Collection under it.
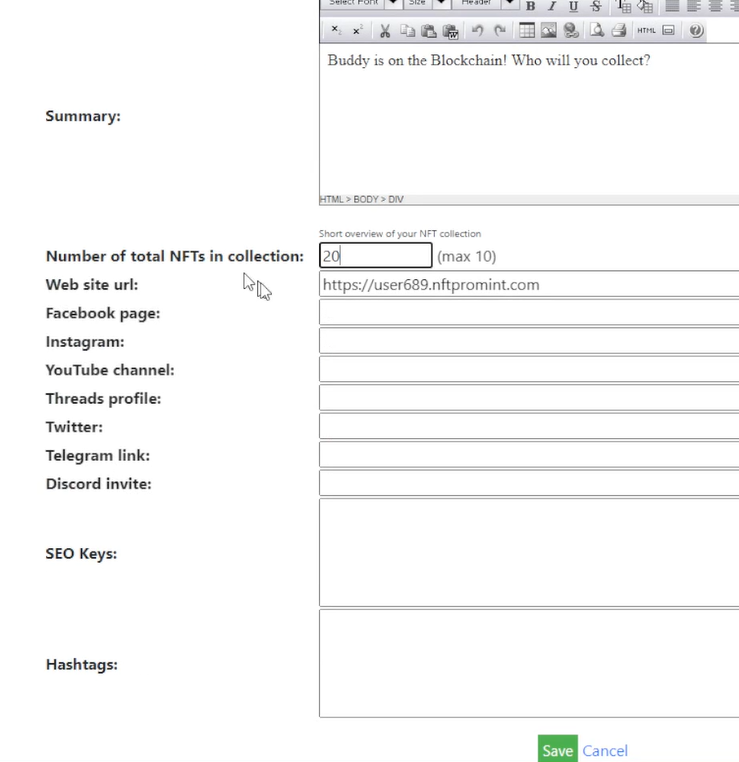
Fill in the form to create the NFT collection details and click on Save button.
Uploading the traits to the platform
Once your NFT is defined, you need to upload all the traits (layer files)
The way you do that is relatively simple, you click the green plus to add a trait.
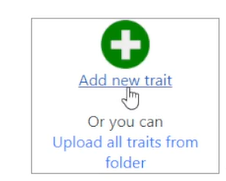
Enter the name of the trait in the popup box and click Next button.
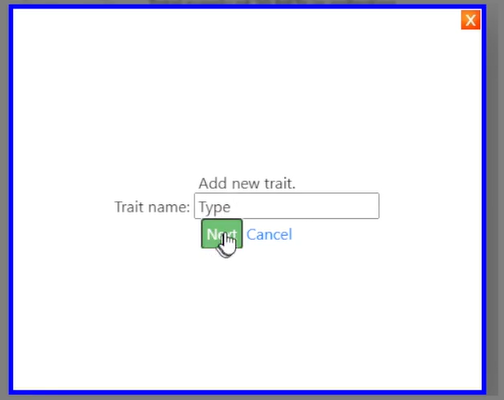
Select the file to use as the first value for this new Trait and click Open.
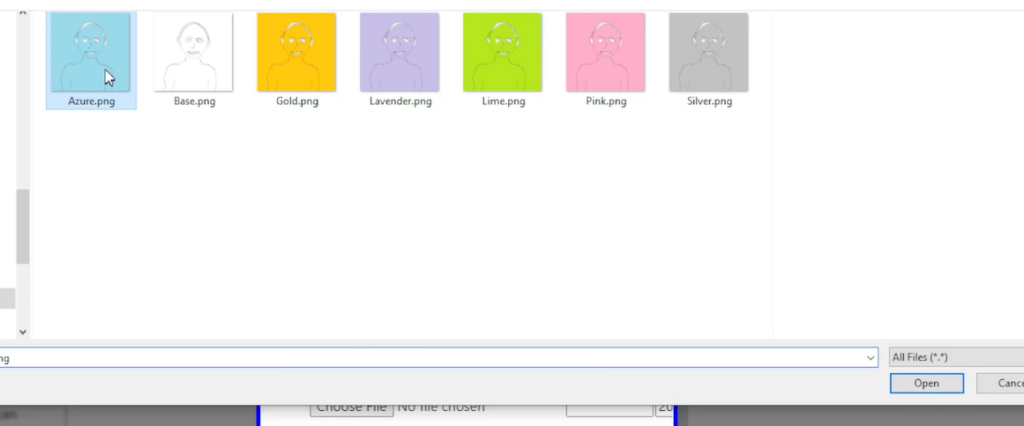
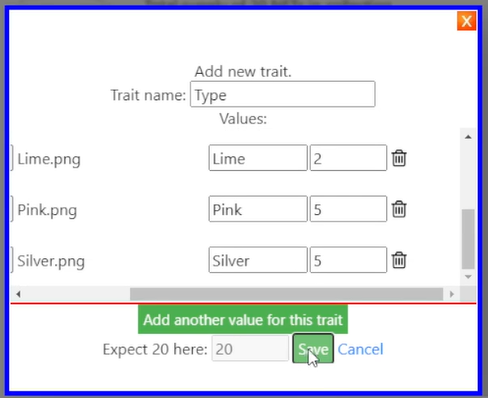
Next, you add a new value for that same trait – for example if you have 6 values, you’d do this 5 more times. So click on the Add another value for this trait button.

Which will popup another file browsing window where you click on the file you want to add.
Continue until all values for your trait are uploaded at which point you’ll need to make sure the count for each value adds up to your total collection size.
Repeat the process for each trait you want and each value of those traits.
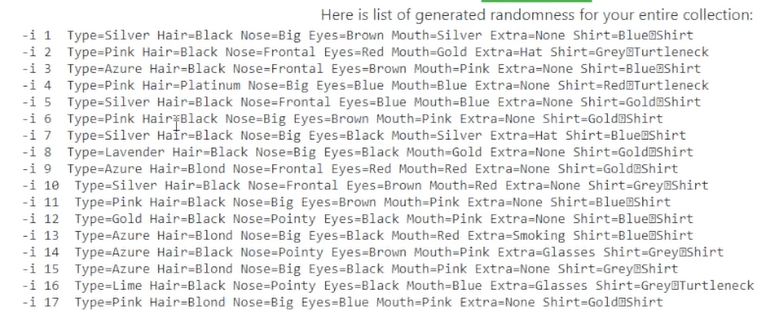
Generating the random list for your collection
Once you have all your layers (trait and values) uploaded, and set the amounts for each value, it’s time to generate the random list.
You’ll notice a series of buttons above your trait details on the page.
Each button needs to be visited in sequence as previous steps need to be complete before moving to next step.
So, click on the List button to see that step.

The only thing you can do there is click the Generate List button after which, a few seconds later, you’ll have the list of your collection.
Choosing effects to apply to your images in the collection
Once your list is generated, you can choose how to process each of the images in the collection.
The idea is that every single image in the collection will have the exact same effects applied to it.
You can apply effects like resizing the image, blurring it, sharpening it, adding a border, adding some painting effect, embossing, etc…
Access and setup up the effects by clicking on the Commands button.
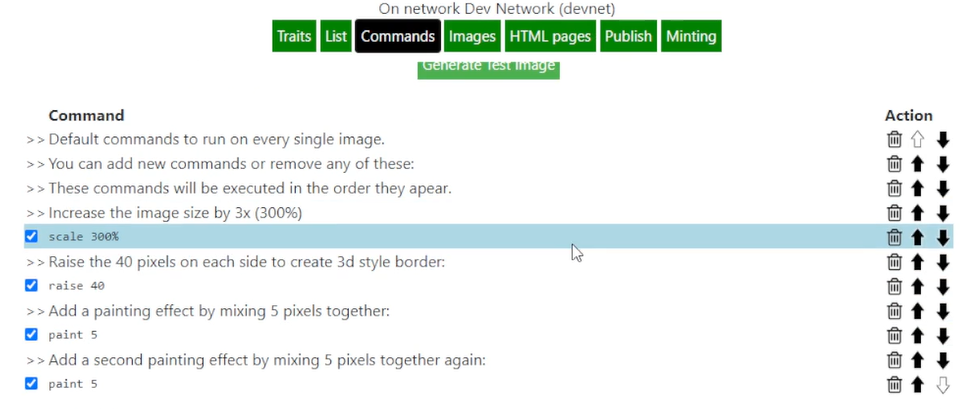
Each effect you choose will be applied in the same order on all images. You can see what the current effects selected will do to the images by clicking the Generate Test Image button.
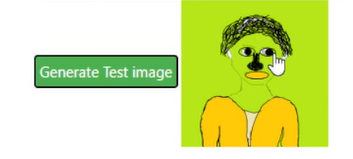
Of course, you’ll do much better than my quick creation!
But this allows you to get an idea of what you final images will look like and you can change the filters and effects until you are happy with results.
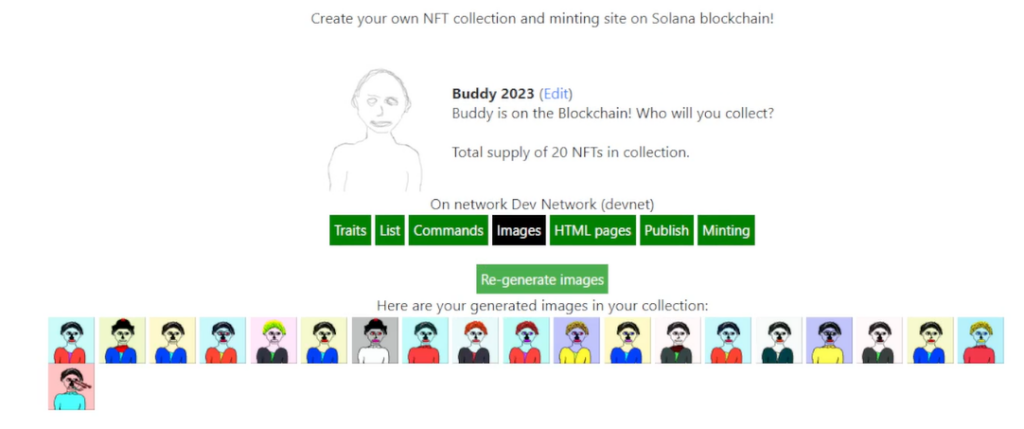
How to generate the entire Random NFT collection
Once you are happy with the filter and effects to run against all images, you are ready to create your full collection.
Just click on the Images tab and then the Generate images button.
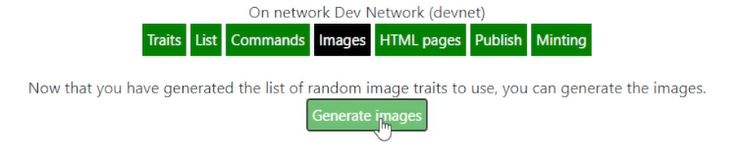
This will begin, the perhaps long process, of generating each image in your collection.
You’ll see gibberish (well, unless you’ve seen output like that before) on the screen as it works towards that goal.
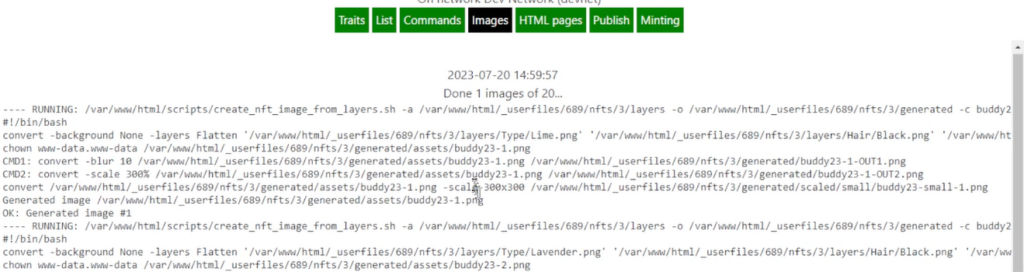
After a while, and if you have a collection with 1000 pieces, it will take quite a while, the screen will refresh with the list of all your images.
Publishing your random collection
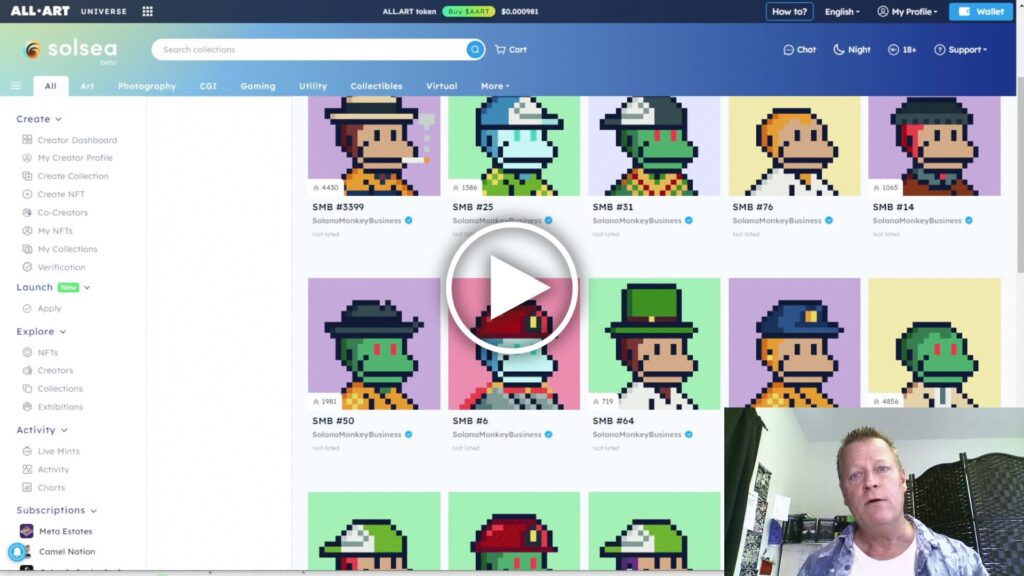
Once the images are all generated, you can publish them on a marketplace like Solsea, Opensea or any of the marketplaces.
On My NFT Engine platform, you can generate a set of HTML pages you can use as a starting point.
There will also be the ability to mint your collection using a tool called the Candy Machine but for now, we’ll assume you’ll publish it with one of the marketplaces.
I won’t go into details here as they have plenty of tutorials themselves but the basic idea is that your images need to be uploaded to the blockchain, or minted.
I did create a blog post before on buying your first NFT on SolSea, it’s Course Income Secrets #395 – How to buy your first NFT with Solana and Coinbase?
What does minting mean?
When you created them on My NFT Engine, that didn’t upload them to the blockchain.
That process is called minting and
When you upload them to the blockchain, you get to choose the royalty percentage and then you can list each individual image and set a sale price for them.
When you sell an image, you get the full amount of the sale (less any transaction fees the marketplace charges) but when the new owner re-sells your image to someone else, you get the royalty.
No matter what price you first listed and sold the image, each subsequence sale of it will give you that royalty.
Conclusion
I know this was a lot to take in and perhaps I’ll need to create a blog post on minting your collection now, let me know if you’d like to see that.
In the meantime, I’d love to see you create your own NFT collection using My NFT Engine! Make sure to let me know about it!
I’d love to be your first collector!
You’ll find more details about this entire process in the video, so make sure to watch it too!
And as always, share this with your friends by clicking the social icons, I’d appreciate it and your friends will too!