How to use Free OpenShot to Easily create course lessons from long video?
If you’ve recorded videos longer than 10 minutes you can probably turn them into online courses!
You have probably been stopping yourself because you’re worried it’s too complicated to do!
I’m going to show you how to extract the lessons from that long long video using a free tool called OpenShot that you can install on your PC or MAC in seconds.
First, find a video you recorded on Facebook, YouTube or just on your phone that is sort of a training you did and lasts at least 10 minutes – 30 is better.
If you don’t have that video, record your next one with the intent of splitting it up in lessons.
What kind of video can you create a course from?
Of course, there are many ways to create a course and most leaders and gurus will tell you that you need to start from an outline and record individual videos for each lesson.
They’ll even tell you that you need to define modules and decide what goes in each module.
I do agree that it’s the best way to create a higher quality course of course, but what if you don’t have the time?
Yes, the quality might not be as great but you’d be surprised at how many people prefer less perfect as it feels more authentic.
So just think of a topic you love talking about and record a video where you actually talk through multiple lessons throughout the video with a goal at the end in mind.
What is OpenShot?
Once you know the video you will use, you need a software to extract the lessons out of it.
OpenShot is a video editing software like Camtasia or VideoStudio but is free and works on PCs, MACs and even Linux and ChromeOS.
For our purposes, it’s definitely more than enough and you can check it out and download it from OpenShot.org.
Once you’ve downloaded and installed it, you’ll need to start it up and load your long video into it.
How to load your video into OpenShot
When you first open OpenShot, it will show you a blank screen with a few empty widows.
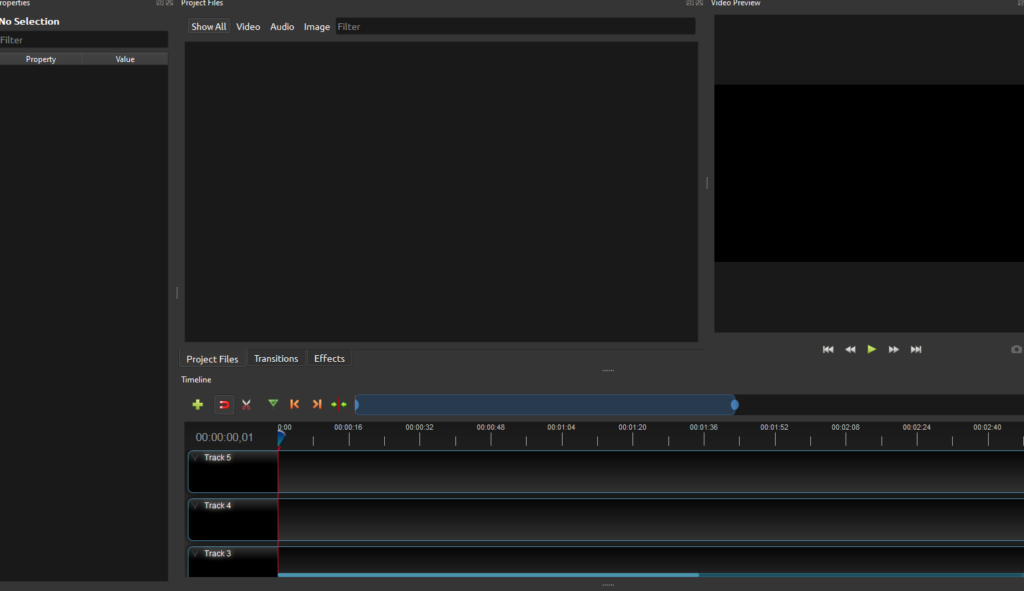
All you need to do is open the folder where your video is and drag it into the Project Files window area.
Just click on the video (with left mouse button) and keep mouse button down, drag the video over the Project Files window area and let go of the mouse button to drop the file there.
After your video is loaded into the Profile Files, you just need to add it to a track.
I usually just use track #1 which just means scrolling down the list of tracks and the drag-and-drop the video from the Project Files onto the beginning of the track.
You are now ready to extract each lesson out of the longer video.
How to extract a lesson from the long video
Once you have OpenShot setup and the video loaded into the track, you are ready to find and extract the lessons from it.
It’s a simple 3 step process:
- Find the start and end of the lesson in the video and mark them.
- Remove everything in video before the lesson and after the lesson.
- Export that lesson video to it’s own video file.
Let’s break it down into each of those 3 steps.
Step 1: Find start and end of lesson in long video
After watching your full video and taking notes of where each lesson starts and ends, you’ll just need to navigate to that location in the full video.
You do that by clicking on the timeline and finding the spot where your lesson starts.
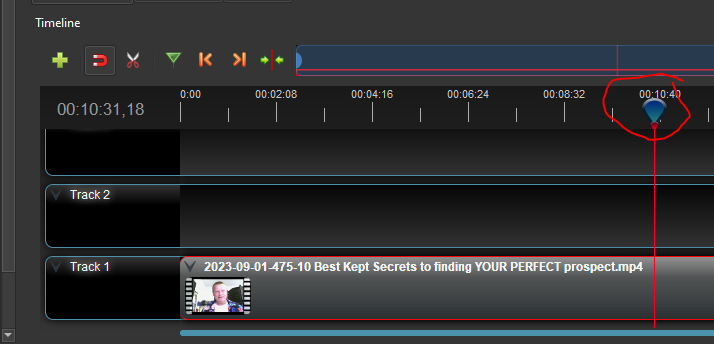
If the position isn’t visible you can scroll left and right by using the bottom scroll bar.
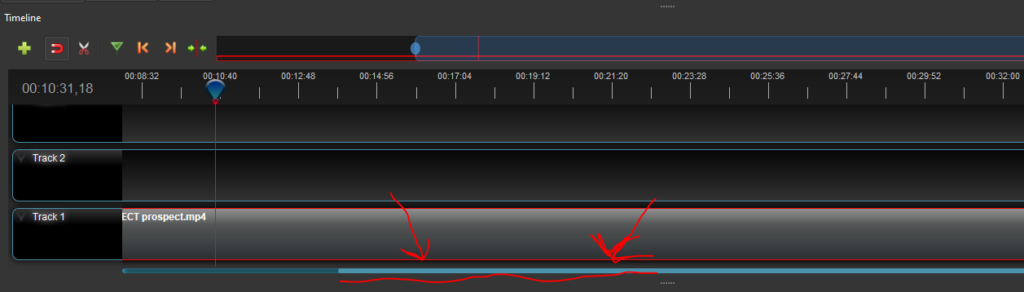
Or you can even zoom out by clicking on the video track and using your scroll wheel on your mouse.
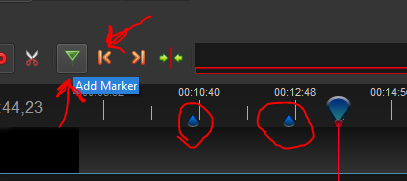
Once you’ve found the start and end of your lesson you want to extract, add markers to easily go between them
Step 2: Removing what is before and after the lesson
Once you’ve marked the start and end of the lesson, you need to remove everything before it and everything after it.
You do that by moving to the markers using the marker moving button.
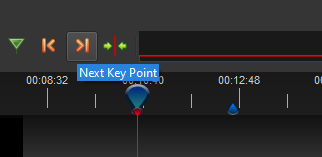
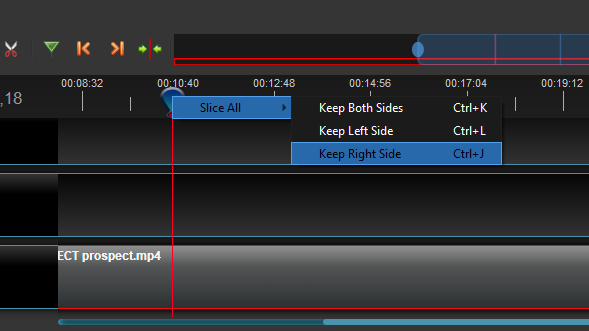
Once you are on the first key point, the beginning of your lesson, right-clicking the mouse, selecting Slice All and then select Keep Right Side.
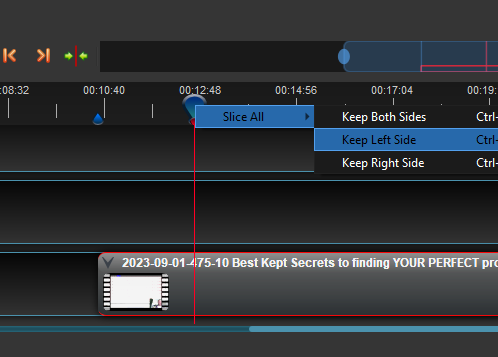
Go to next marker and do the same but choose Keep Left Side this time.
This will leave you with just the lesson section of the full video.
Step 3: Export lesson video to it’s own video file
Once you have removed everything in the video, you can extract the lesson by exporting it.
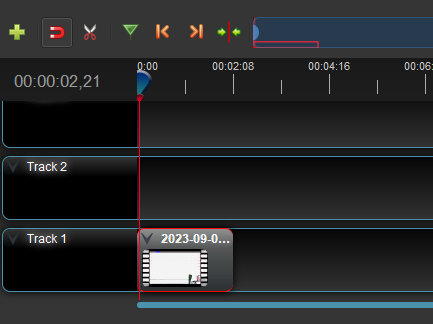
Start by moving the short video to the beginning of the track.
Next, click the little export button on top of the screen. It’s the red circle close to menu entries.
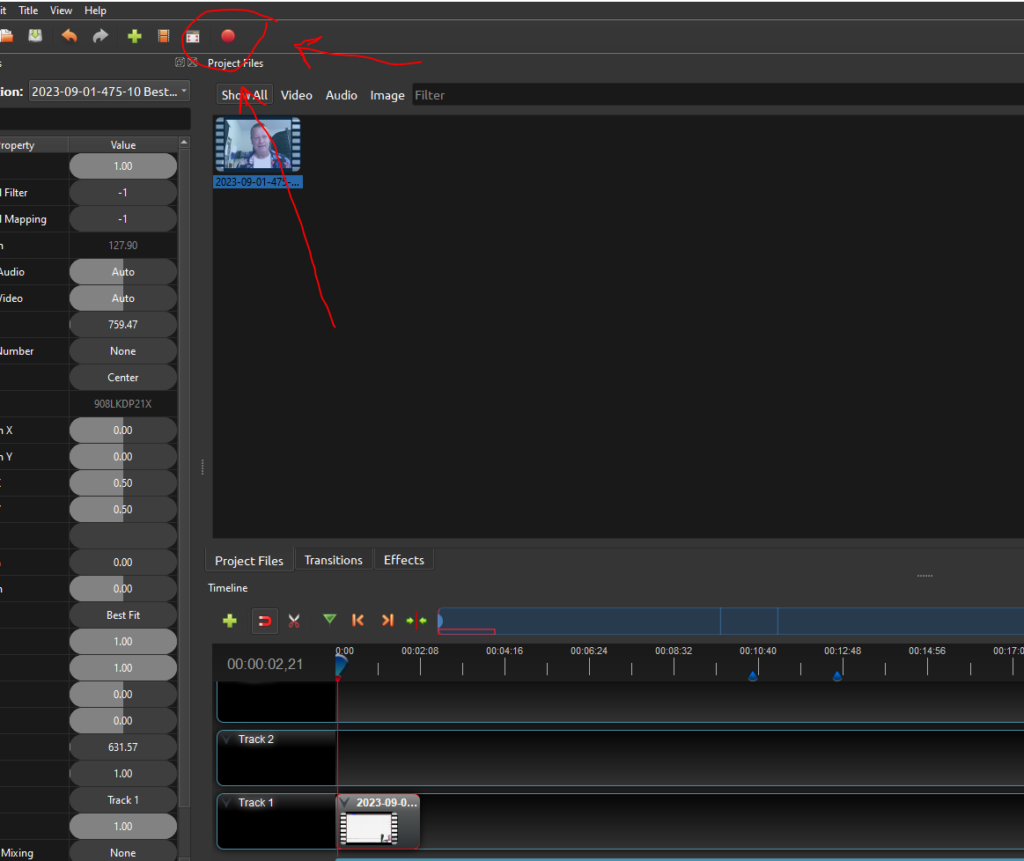
This will popup the Export video window where you choose the filename and the path to save it to.

You can also change the export quality by changing the Target, Video Profile and Quality options, but I find the defaults fine.
Click the Export Video button and let it do it’s thing.
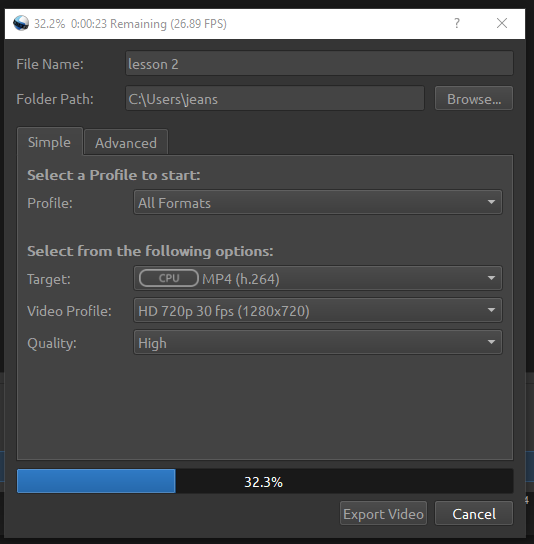
Depending on how long your video lesson is and your computer’s power, it can take a few seconds to a few minutes to export your lesson.
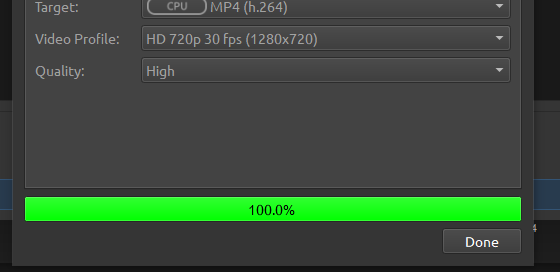
Once complete, the progress bar will show green with 100% in it where you can just click Done button.
Exporting the rest of the lessons
You can now export every other lesson the same way.
You’ll want to start by pressing CTRL-Z a few times to undo the steps you did to extract the last lesson so you can start over for the next lesson.
Follow the same steps to find the next lesson’s start and end times, remove what’s before and after, move video to start and export it.
After no time, you’ll have as many short videos as you have lessons.
Creating an online course using those lessons
Once you have all those lessons, you’ll want to upload them to a course hosting platform.
Depending on the platform, you might need to upload the videos to YouTube first so do that if needed.
In the accompanying video, I show you how to upload them to Click eCourse platform.
I won’t go into the details here as the video does that but you can get your free account at https://www.clickecourse.com
Conclusion
It’s a pretty simple process and can be a great way to create an online course quickly.
Especially if you are already publishing 30 minute videos regularly.
You just need to think about splitting the video into lessons and record it to make it easier.
Watch the video to see exactly how to do that with OpenShot and how to publish your could on Click eCourse.
And don’t forget to share this with your friends.