How to Create Funnel with Digital Mentors Creator Hub?
I will show you how to use the Digital Mentor’s Creator Hub to create a Funnel for your product.
I actually have not created a funnel with this software yet so let’s get started.
Just like any other business software that includes funnels, it’s always going to be a slight learning curve to use a new tool.
Before we get into it though, let’s explain a few things…
What is Digital Mentors?
In case you’re wondering what Digital Mentors is, I can certainly tell you.
If you google them, you’ll find a definition such as “Digital Mentors support people to build their confidence and skills to use digital technology. “
Of course, I’m referring to a specific group of people, not the generic definition, although it’s fits them quite well.
Except that the Digital Mentors I’m talking about are there to help you with building an online business using personal branding and attraction marketing strategies.
In today’s social media influenced society, those are the skills that will make all the difference.
What’s a funnel?
Next up is the question about a funnel.
You surely know of a funnel in the kitchen that helps you pour a liquid through a spout.
Well, the funnel I’m talking about here is a sales funnel, or a sign up funnel.
It’s a similar idea which helps you to guide your prospects to a goal you have for them.
It could be to sell them a product, have them join your email list or register for a webinar.
What is the Creator Hub?
Lastly, before we go into creating a funnel with Digital Mentor’s Creator Hub is the Creator Hub itself.
Basically, the Creator Hub is a all-in-one software platform that helps you manage all aspects of your online business.
From setting up a Web site to building an email list, sending emails to your prospects, keeping track of your interactions with them using a CRM to creating funnels and tracking your income.
It even integrates with your social media accounts!
If you have different software subscriptions for your email autoresponder, your funnel software, your website and your CRM not to mention social media tools, then you need to look into the Creator Hub from Digital mentors!
Creating a Funnel with Creator Hub.
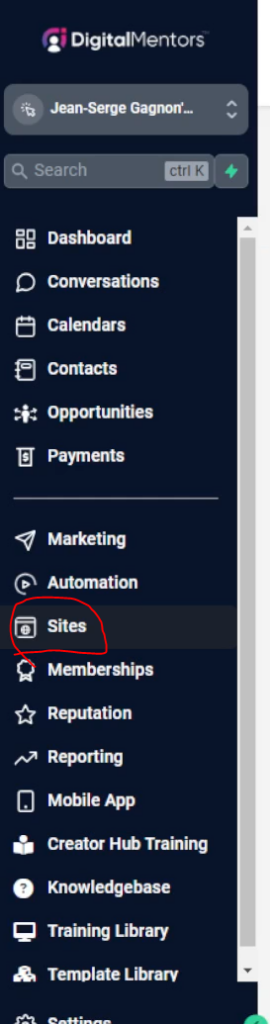
You’ll first start by selecting the Sites menu entry.
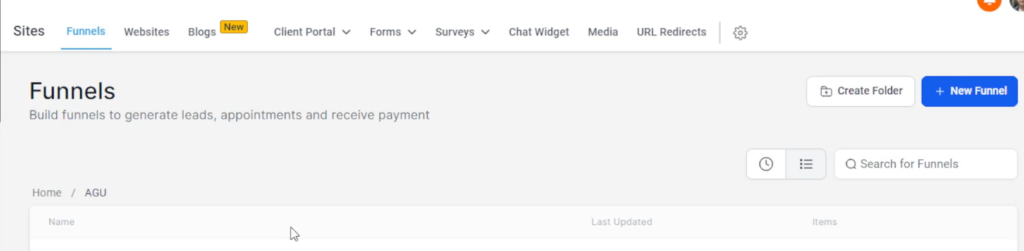
Which will take you to the Funnels page by default where you can click on the blue New Funnel button on the top right of the page.
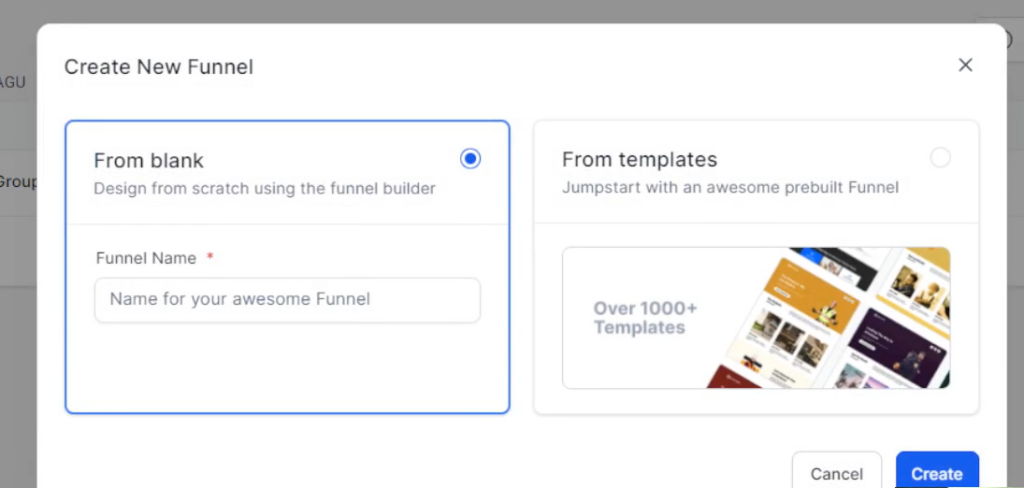
You could also create a folder first to put that new funnel in, but you can also move the funnel to a folder later.
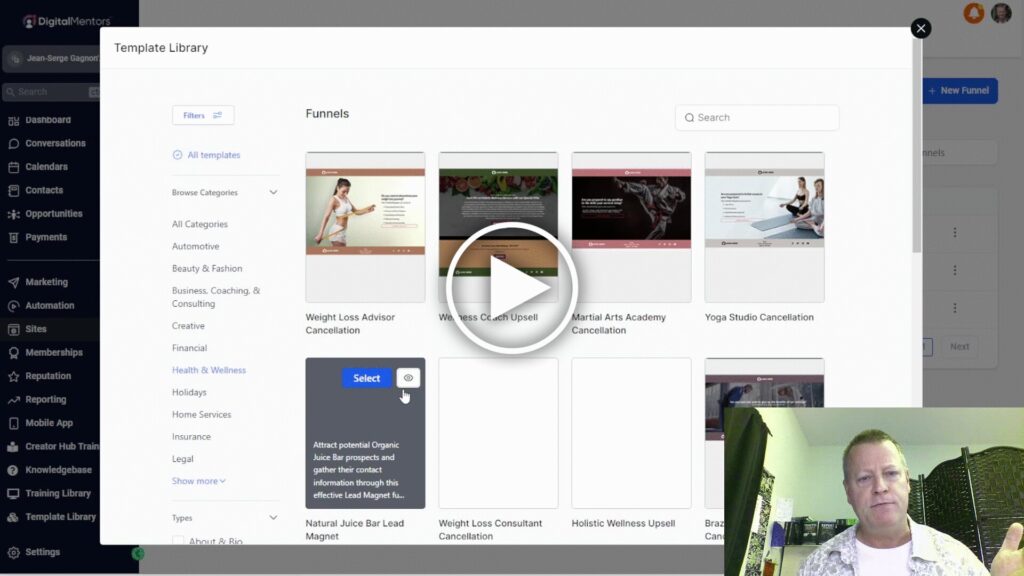
This will popup the funnel creation wizard starting with your choice of a new blank funnel or you can choose from 1000s of templates.
After a few seconds, your new funnel will show up on the screen. If you picked from blank, you’ll see it shows with 0 Steps.

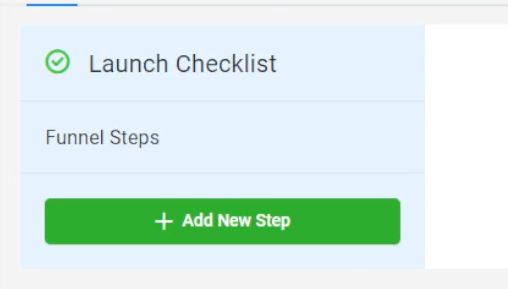
Just click on the name and the edit will open with the green Add New Step button.
Creating your page in your funnel
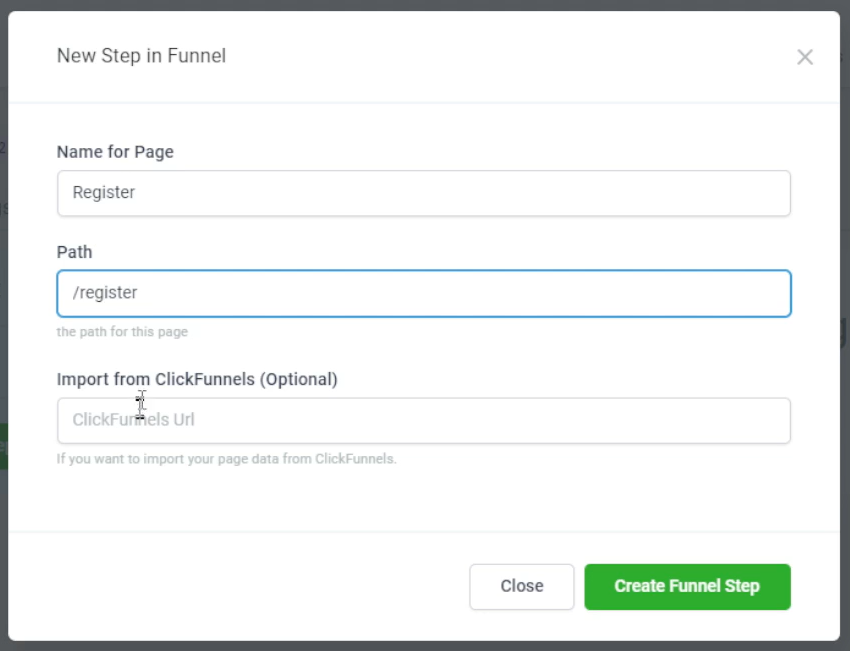
When you add a new Step to your funnel, you’re really creating a page for it.
Each page needs a name a unique path, so enter that and click the green Create Funnel Step button.
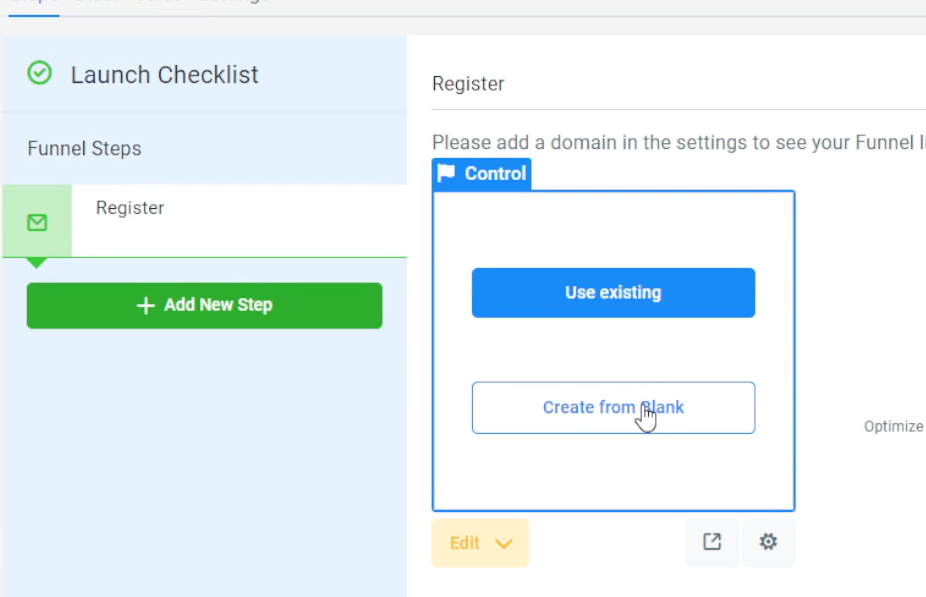
Next, you need to add content to your page. Just click the Create from Blank and you’ll open the page editor.
The page editor starts up completely blank (when you choose that option) with the option to add a new Section.
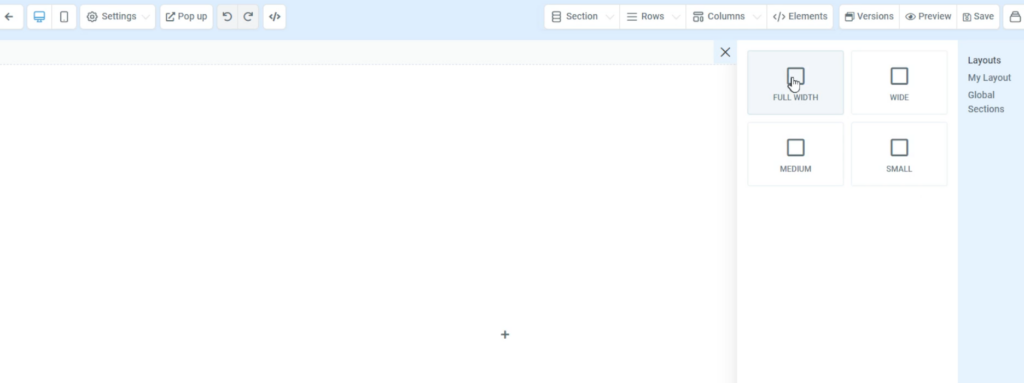
Add a section so you can begin to add content.
What are the funnel page editor parts to know?
Before going further, I feel I need to at least explain the main funnel page components.
The page editor using these concepts to allow you to create a page:
- Sections – they are a page separator and contain everything else with them. It’s like a page in a book.
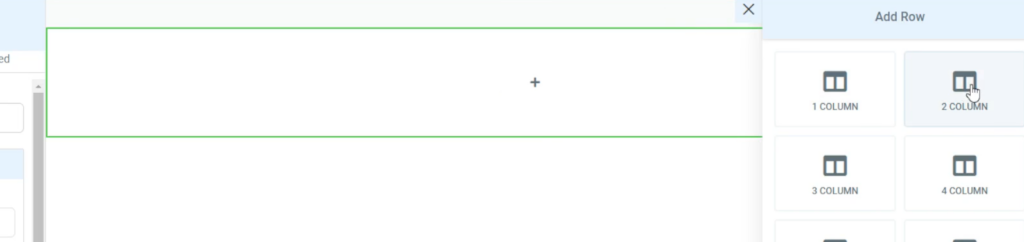
- Rows – they allow organizing things in the section in neat rows – think of lines on page or chapters.
- Columns – they allow to organize things in a row – think of an picture in a book that is centered on page.
- Elements – they are everything else – like a text box, an image, a countdown timer, a bullet list or button on your page.
Basically, elements are the smallest pieces that can be organized. Elements go inside of columns, Columns go inside or Rows and Rows got inside of Sections.
In reverse, that means that you must first create your page, then add sections, then add rows in your sections, then add columns in your rows and finally add elements in your columns.
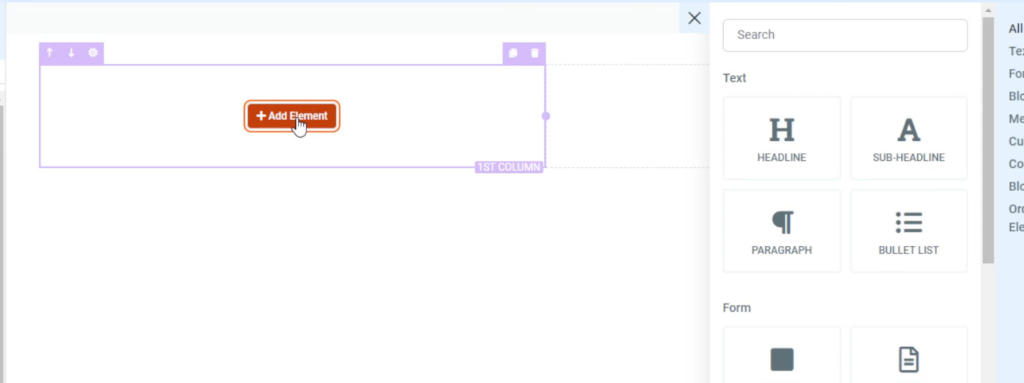
How to add an element to your funnel page?
Say for example, you wanted to add a header to your funnel page. You’d first add a section.

Then, you’d add a row inside your section.
Lastly, you’d add the element to your column.
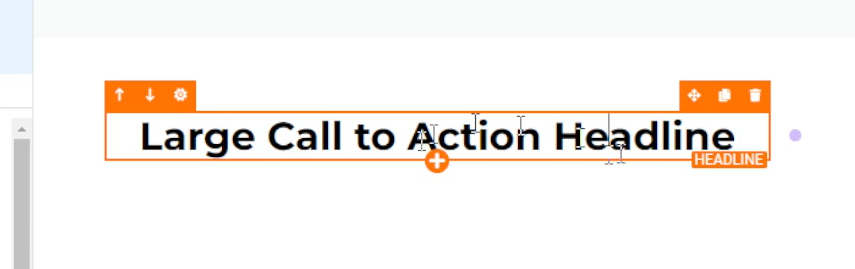
And if we chose to add a headline, you can then edit the text.
You just repeat that process of adding a new row for each part of your funnel.
Conclusion
Of course, I could go on and show you even more of how to edit your funnel in the page editor, like colors, padding, font sizes, images and so much more but it would take 10 documented like this one.
Instead, I’ll direct you to watch the video so you can see it in action as I’m learning to use it.
That’s right, this video is the first time I use the software to create a new funnel.
Pretty slick if you ask me and I’m sure you’ll get used to it real fast.
Oh, also, please make sure to share this blog post and video with your friends.