How to create Sales Funnel in Digital Mentor Hub?
There’s a new platform taking on the world by storm and today I’ll show you how to create sales funnel in it.
Just like any other platform, there’s a learning curve and even for a techie person like me, it takes a while to get comfortable with it.
The Digital Mentors hub lets you manage your entire business including web sites, email broadcasts, opt-in funnels, sales funnels, a CRM and it even integrates with your social media profiles.
When I first started using it, I was lost because it was different than other platforms I used before.
I’ve been able to go through their training to understand each piece but thought it would be great to put it all together for you.
What is Digital Mentors Hub?
Digital Mentors Hub is a platform that does it all and it’s a white labeled platform based on another platform that is taking on the world by storm.
The other platform I’m referring to is called Go High Level and the reason it’s gaining in momentum and use is because it’s business model is that leaders can give (or sell) access to their white labeled version of the software to their tribe.
This is why Digital Mentors called it their Hub software as they own the rights to resell it (or give it away).
I think it’s fantastic that they don’t sell the software, but rather direct access to them for any help and the software is just a bonus – this may change in future as other leaders emerge in that group, but who knows!
What is a Funnel?
The simplest kind of Funnel is an opt-in funnel which is usually two pages, but it could actually just be one.
I certainly do not recommend an opt-in funnel with a single page as it’s much better to have a second page as a “you are in” page with next steps.
The opt-in funnel only needs an form where visitors can enter their email for something in return sent to them by email.
Although an opt-in funnel still requires a few steps to create, we aren’t covering how to do that in this post.
What is different with a Sales Funnel?
You might think a Sales Funnell is just any old Funnel but there’s quite a few moving pieces to it.
In an opt-in funnel, you’ll need a form, a workflow and the funnel pages.
In a Sales funnel, you also need to create a Product and an Offer.
Of course, you will also need to be able to accept payments and have your account configured properly, this is assumed to have already been done.
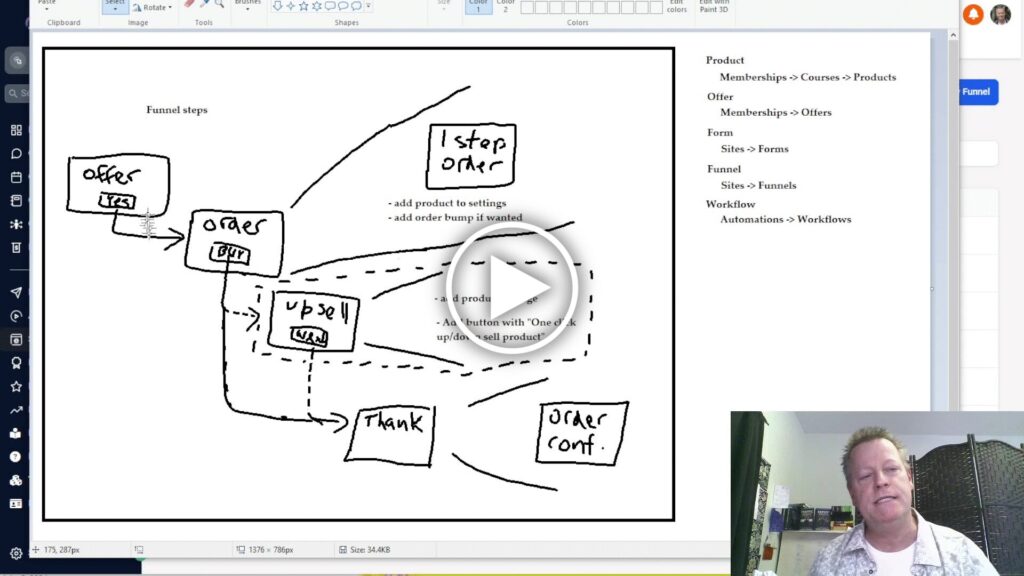
What does a Sales Funnel look like?
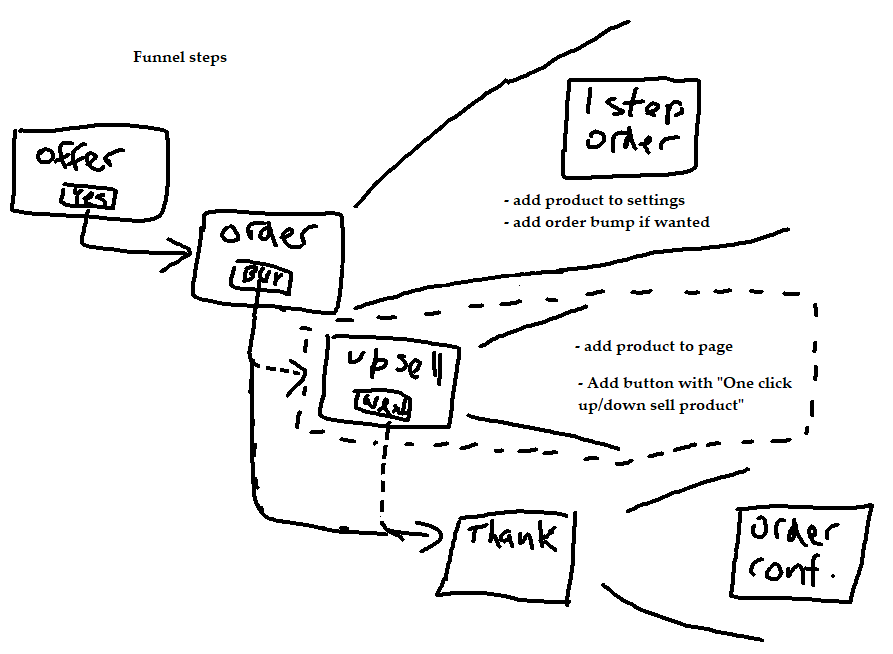
So, a simple Sales Funnel looks something like this with the Upsell page being optional (but recommended of course)
You’ll have 3 or 4 pages in your Funnel:
- Offer page
- Order page
- Upsell page (optional)
- Thank you page
But, before creating your funnel, you’ll need to create these assets in the Digital Mentors Hub:
- A product
- An Offer
- A form
- A workflow
Let’s go then…
Creating a product
You’ll need to have a product to sell them which can be a digital course or just a placeholder for their purchase.
To create the product, you’ll navigate to the Membership page and hover over the Courses tab and click on Products.
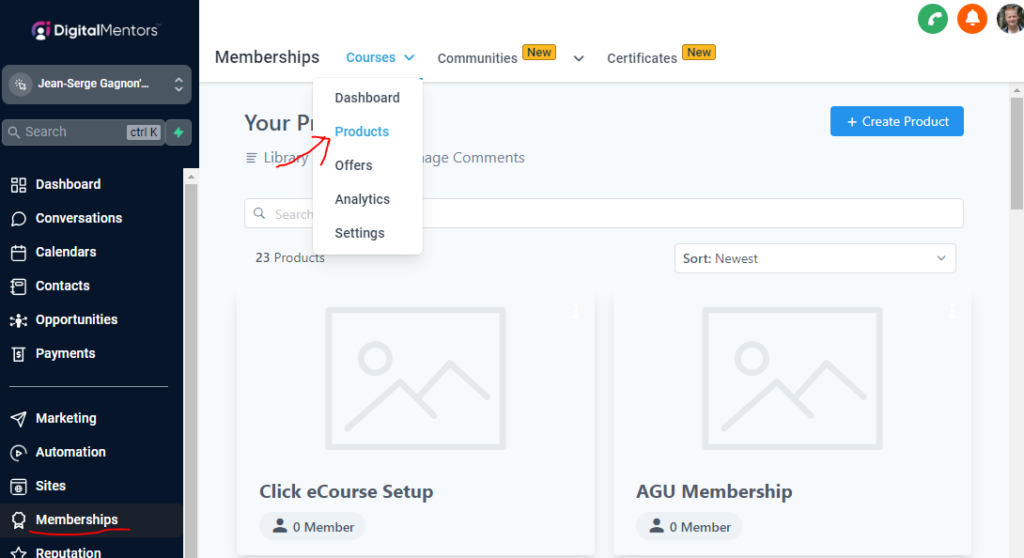
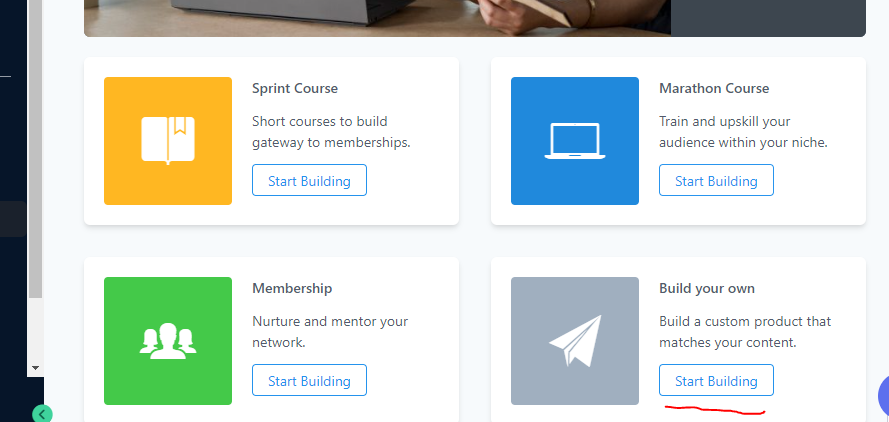
From that page, click on the Create Product button and choose the type of product you want.
I’ll just suggest a Build you own option since we are just talking about creating a product to be able to create that sales funnel.
Give your product a name (users will see this name) and that’s it (for now), your product is created.
You can fill it in later but this is all we need to do to be able to create a Sales Funnel.
Creating an Offer
Once you have a product created, you can then create an Offer for it.
You must create the product before the offer because the offer needs to include the product in it.
To create an offer, you’ll navigate to the Membership page and hover over the Courses tab and click on Offers option.
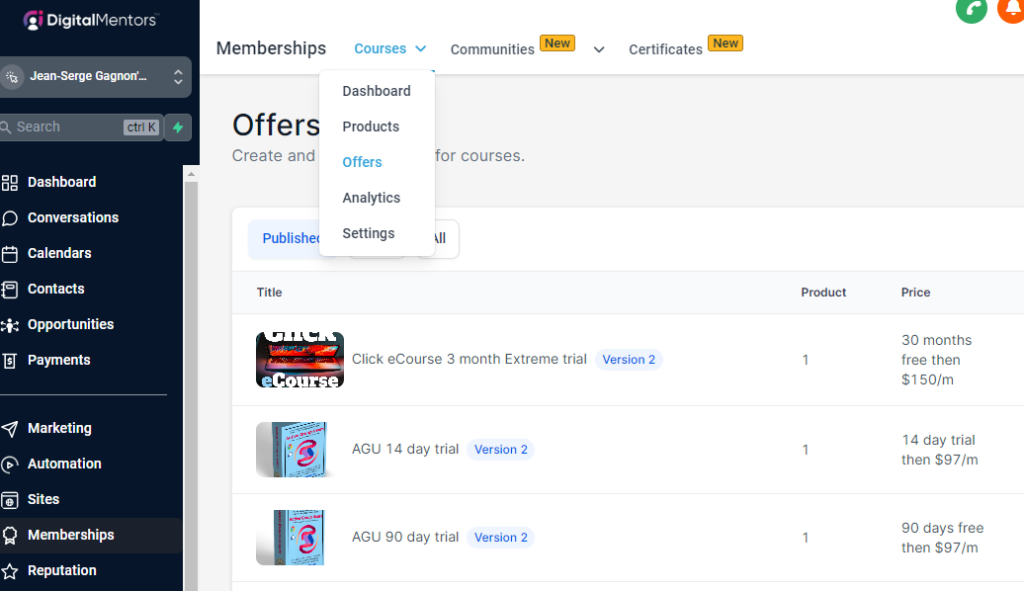
Once there, click the blue Create Offer button on the top right and fill in the form.
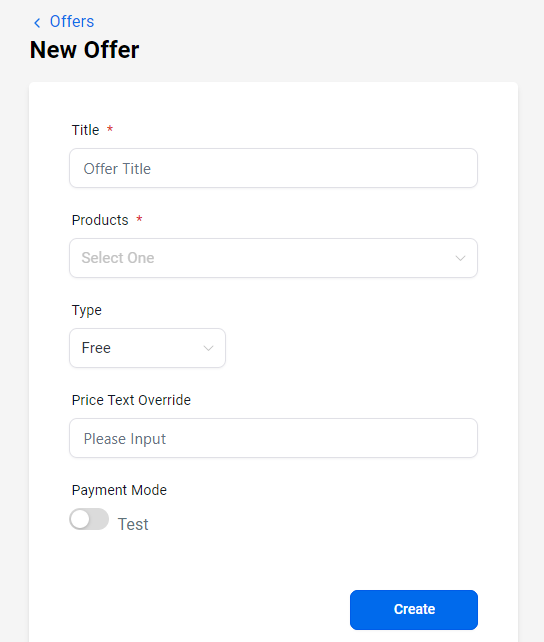
The Title is for you, so it can contain details to help you understand the offer (like agu sub 1m trial $150/m)
Then select the product you just created from the pull down (you can add multiple products in an offer, but for now we are just adding the one).
Select the type of product (one time or recurring) as this is a sales page, it can’t be free and enter the price details.
For example, I’m setting up a 1 year offer of my software, then $97/m for $297.
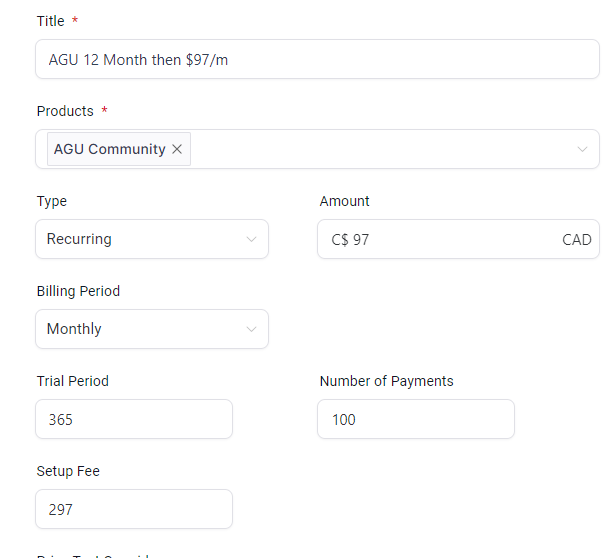
BTW, if you want to work with USD and you don’t live in the US (like me, I’m in Canada), you’ll have to go edit the offer after as it forces you to use your local currency for the setup.
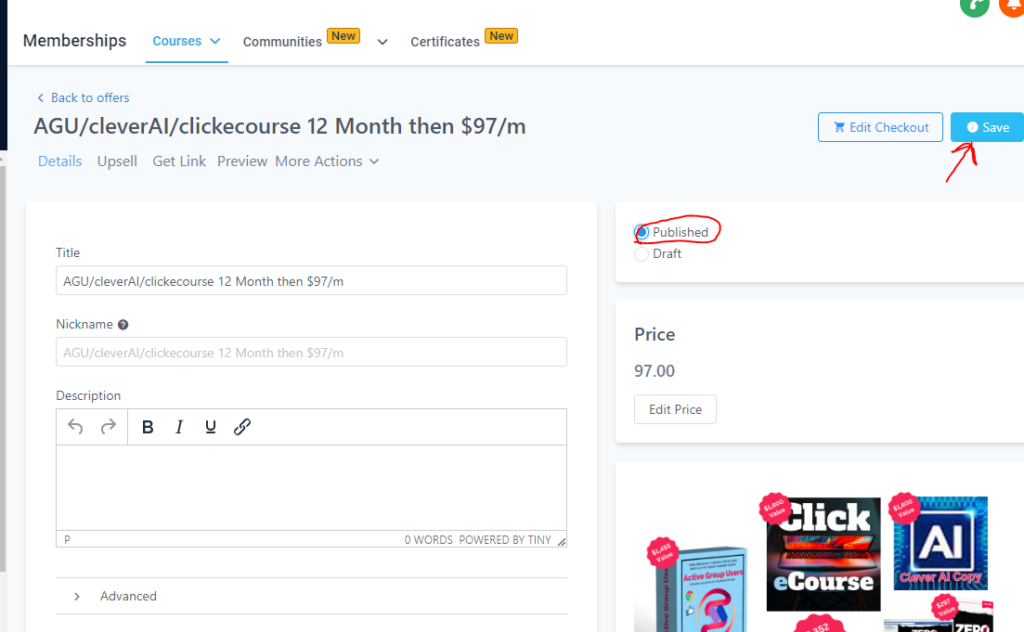
After you click the create button, you’ll need to publish your offer. You can also add an image and description but that’s not essential if we are creating a Sales Funnel.
Creating a Form
In Digital Mentors Hub, the form on the funnel page that users enter their name, email, phone and other data is created separately and then you add that to your funnel page.
To create a form, go to Sites and then click on Forms.
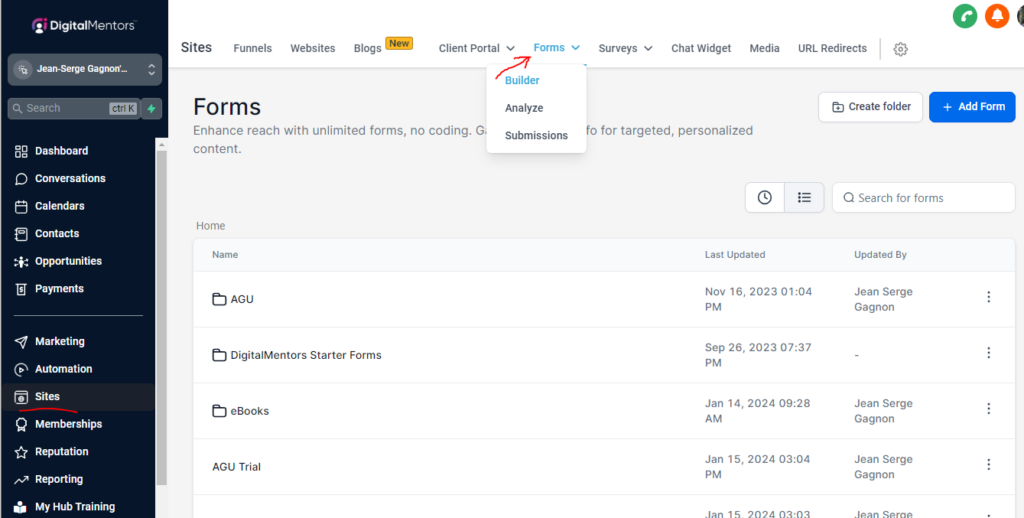
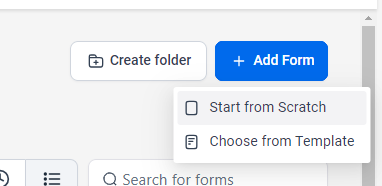
Once there, click on blue Add Form button and then Start from Scratch.
Give it a name…
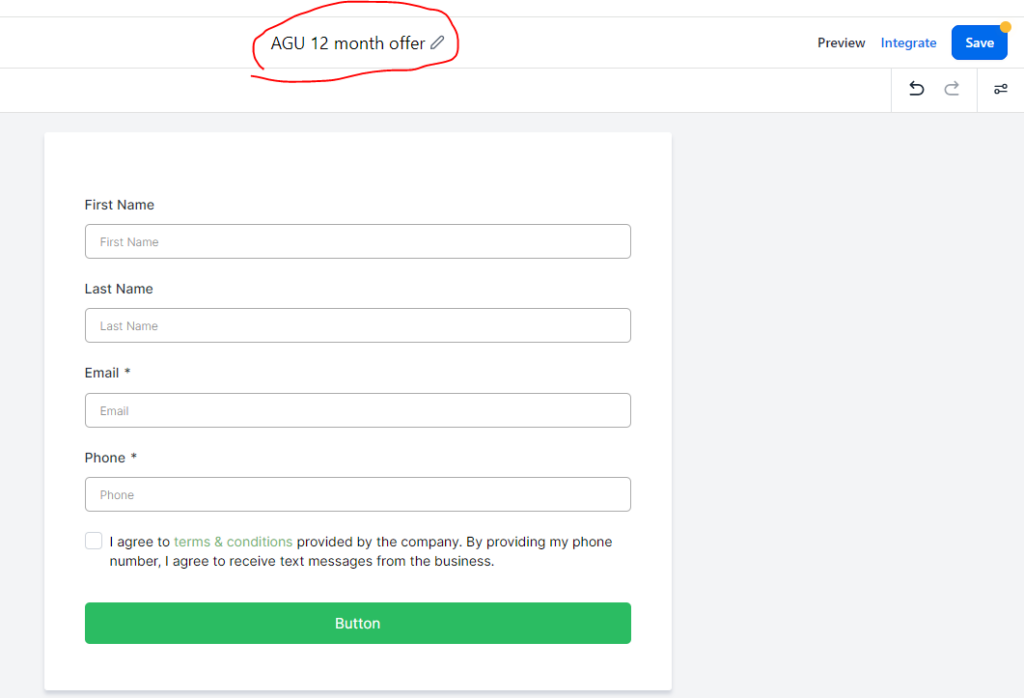
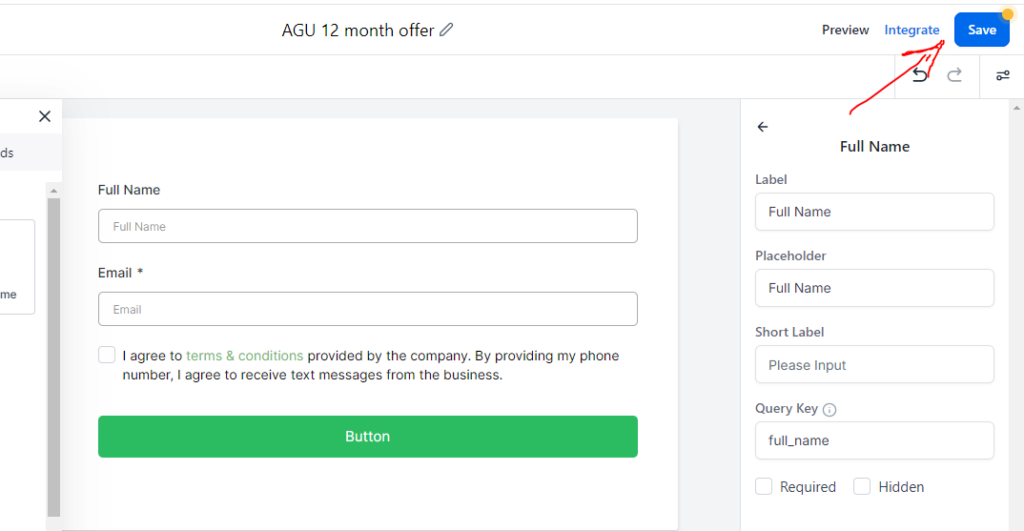
And if you want to change the fields, you can remove then by clicking the little x.
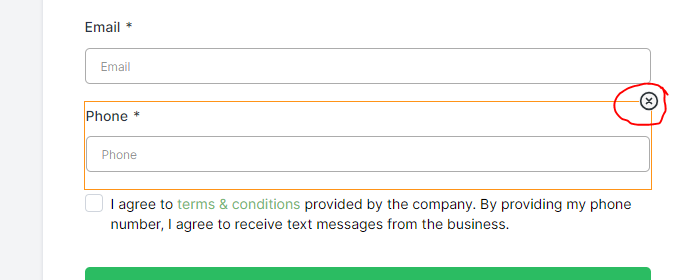
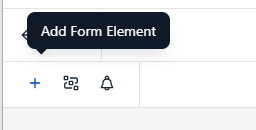
And add new fields by clicking the + on top left.
For example, I removed the Phone, First name and Last name and added the Full name field.

To finish with this form – click on Save to save it and then the Back on top right to exit form.
Creating the Funnel
With Digital Mentors Hub, there are pre-built funnels for you to use.
You could create the funnel from scratch but let’s use the templates.
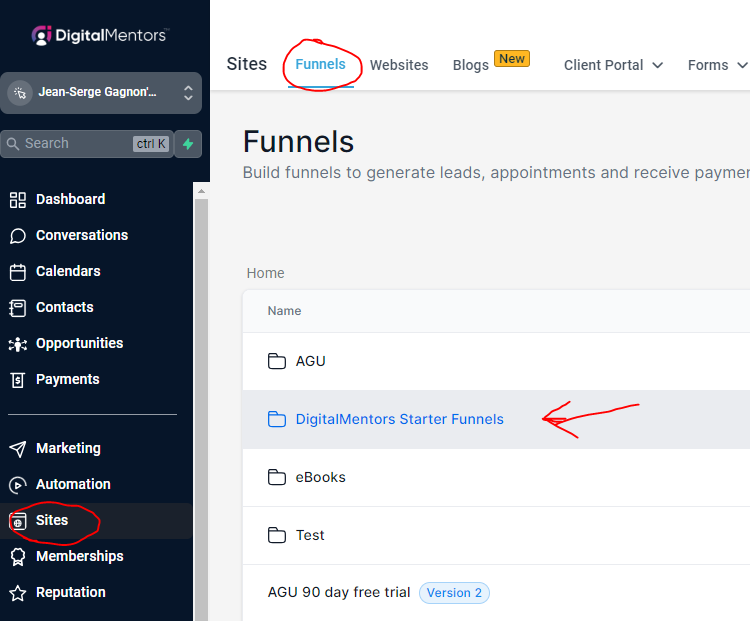
Go to the Sites page (it defaults to Funnel view)
You’ll see the Digital Mentors Starter Funnels, click into that.
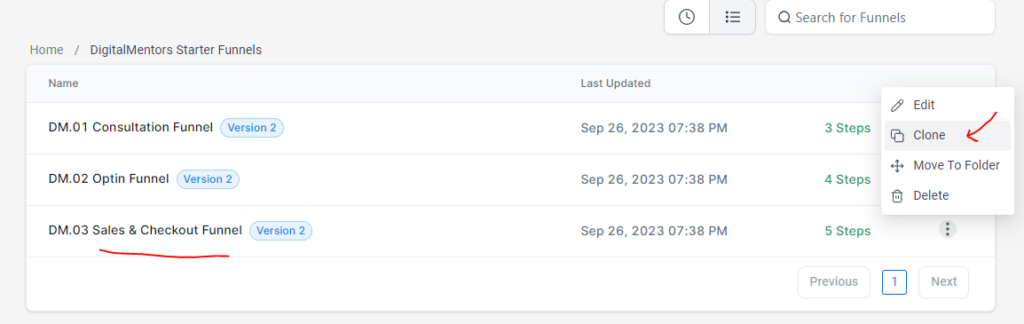
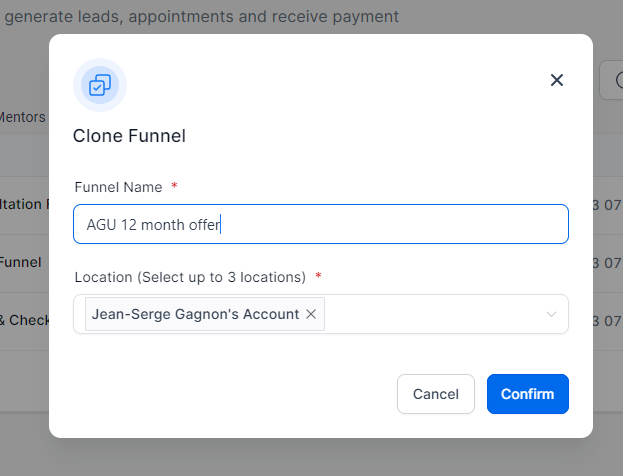
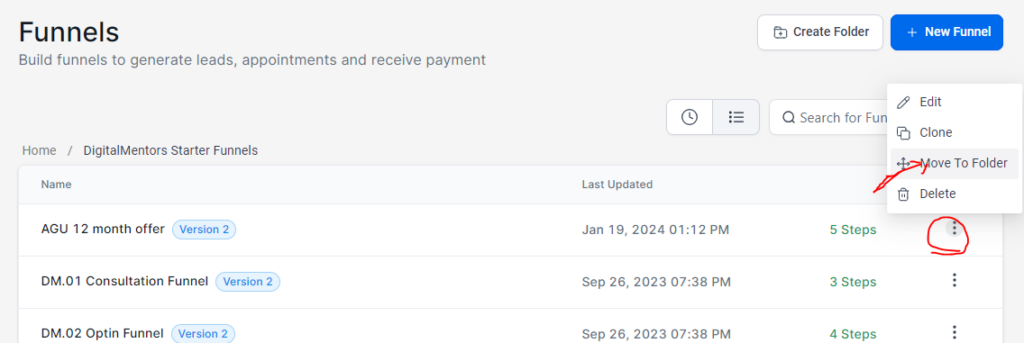
From there, you’ll want to clone the Sales Funnel by clicking the 3 dots and selecting Clone option.
Give it a name, click Confirm
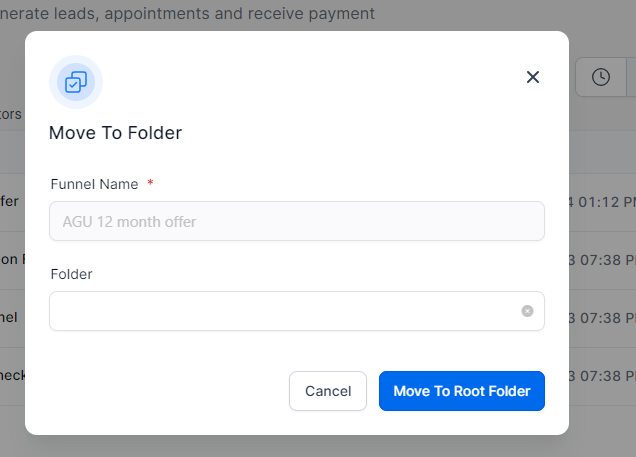
Lastly, move it from this folder to root folder by clicking 3 dots and selecting Move (you might need to wait or reload page).
Leave it blank to move to root folder.
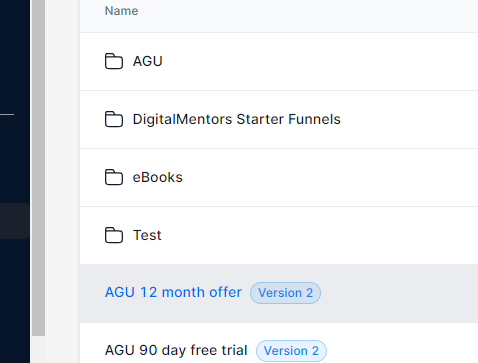
Click on home to go to root folder and find your new funnel template.
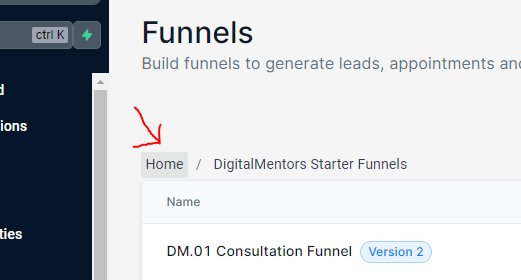
Click your new funnel to open it up.
How to add the offer and product to your Sales Funnel
Go to the checkout page and click on the products tab to add your offer.
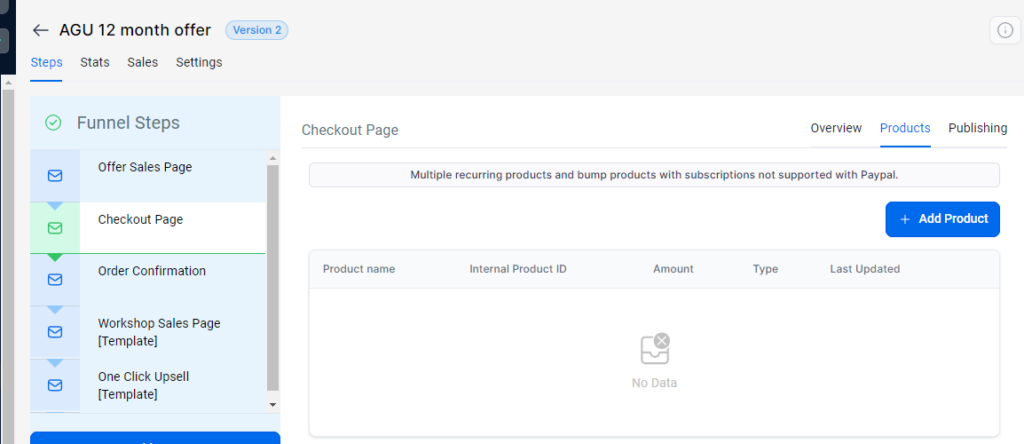
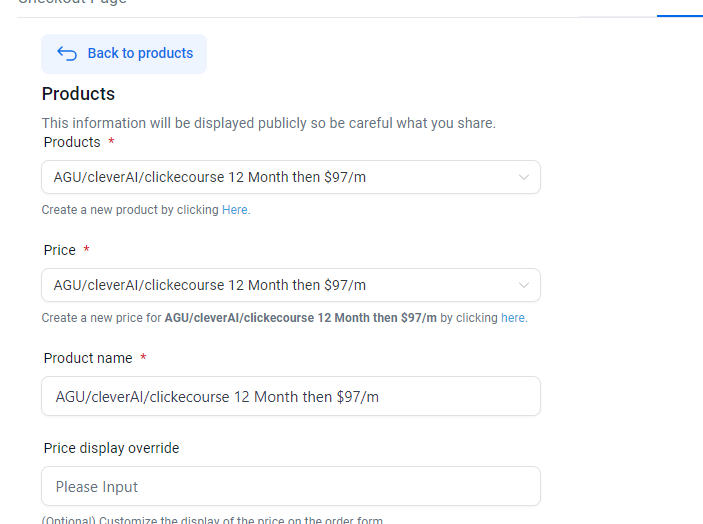
Click on Add Product and select the offer you created and the price you created and click Save.
You will also want to edit the Offer page to add the form you created on it if you want to include a freebie on the Offer page but that’s not needed for a strict sales funnel.
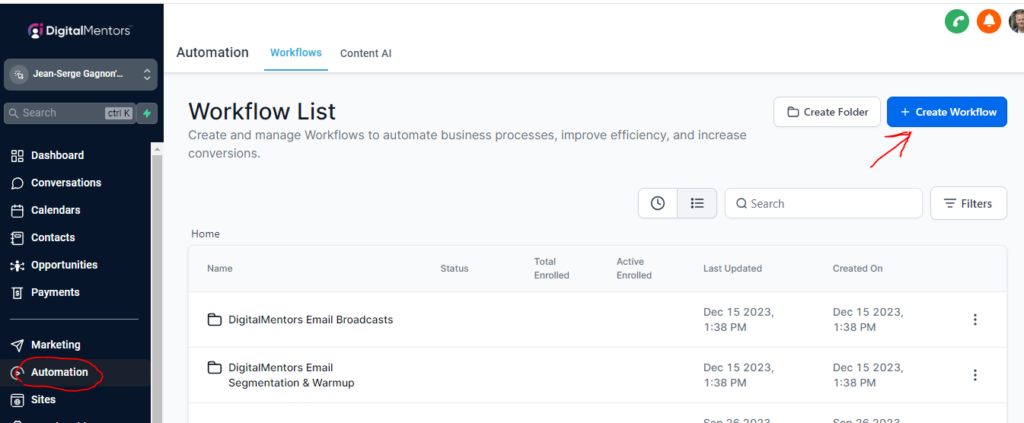
Creating the workflow
Lastly, you’ll need to create the workflow which is what you want to happen when the user buys your product.
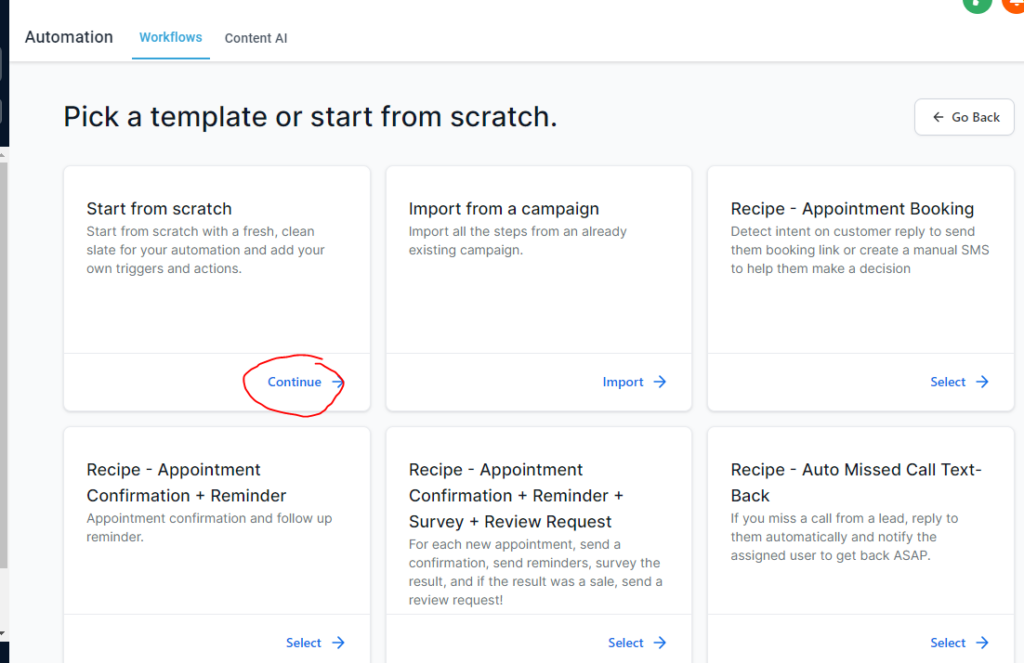
Go to the Automation page and click Create Workflow
Select Start from scratch
Give it a name by clicking on the generated name.

You can do a lot in a Workflow, but for now, all we will do it send the user a message.
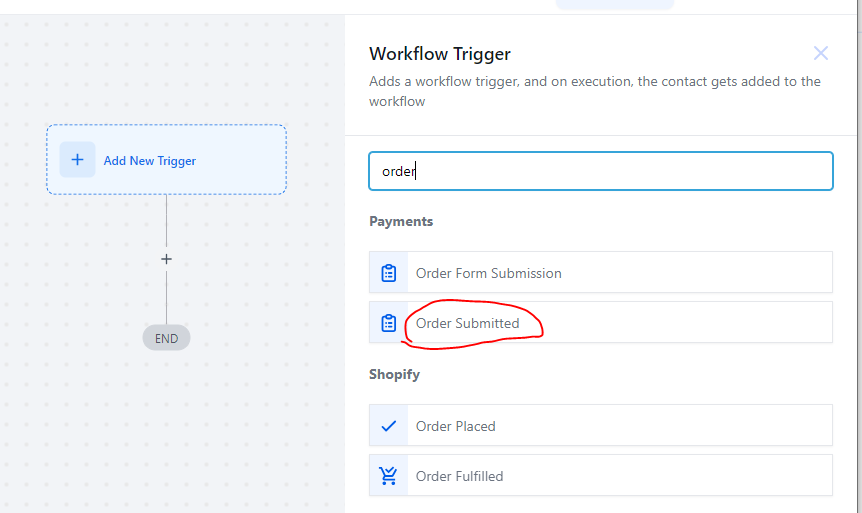
Click the Add New Trigger and enter Order in the filter box and click the Order Submitted option.
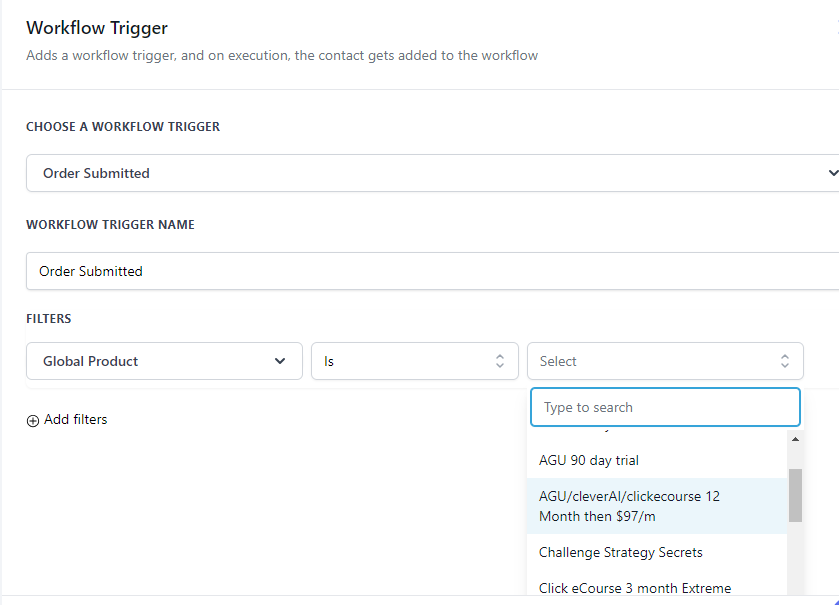
Click on the Add filters, then select Global Products, then “is” and lastly select your new product and click the Save Trigger on bottom right.
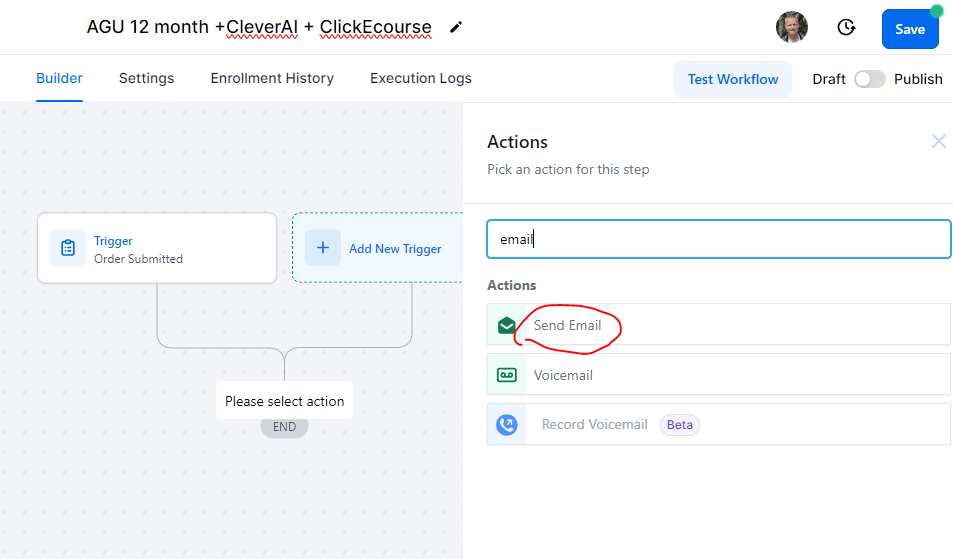
Click on the + to add an action

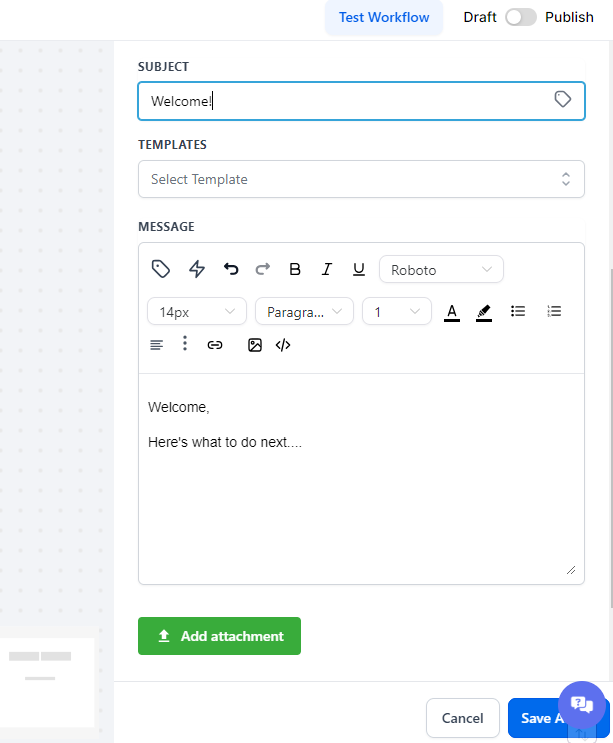
Type email in the search box and click the Send email action.
Fill in the email details and click save action button.
Publish and Save the workflow

Conclusion
There you go, with some editing of content and funnel pages you are done!
You’ve created your first Sales Funnel in Digital Mentors Hub!
Watch the video to see the creation in action.
Don’t forget to share with your friends by clicking the social icons.